
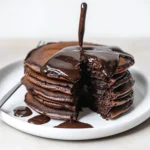
There’s something almost magical about the moment when chocolate pancakes hit a hot griddle – that gentle sizzle, the rich cocoa aroma rising in tendrils of steam, and the anticipation of that first heavenly bite. I’ve been perfecting my Chocolate Pancakes recipe for years, and I can honestly say these pillowy-soft circles of chocolate bliss have become my family’s most requested weekend breakfast. What makes these Chocolate Pancakes truly special isn’t just their deep, complex chocolate flavor that walks the perfect line between sweet and rich – it’s their incredible texture. Somehow both fluffy and substantial, with little pockets that capture pools of melted butter or maple syrup in the most delightful way. Whether you’re surprising someone special or simply treating yourself, stick with me to discover how a few simple tweaks to traditional pancake batter can transform your breakfast table into a chocolate lover’s paradise!
Why You’ll Love These Chocolate Pancakes
Have you ever tried making chocolate pancakes only to end up with flat, rubbery discs that taste more like chocolate-scented cardboard than an indulgent breakfast treat? This recipe solves that common frustration by incorporating specific techniques that ensure your Chocolate Pancakes rise beautifully and maintain that coveted tender crumb.
I still laugh remembering the Sunday morning when my notoriously picky nephew stayed over. He’d been turning his nose up at nearly everything I offered, but when these Chocolate Pancakes hit the table, his eyes went wide. “These taste like a birthday cake and a pancake had a baby,” he declared before devouring three in record time. Now he asks for them by name whenever he visits, and I’ve even taught him how to help make the batter.
What truly makes these Chocolate Pancakes a staple in my recipe collection is their incredible versatility. Having last-minute brunch guests? Dress them up with fresh berries and whipped cream for an elegant presentation. Making breakfast for kids? A simple dusting of powdered sugar and a few chocolate chips create pure morning magic. Need a dessert in a pinch? Warm Chocolate Pancakes topped with a scoop of vanilla ice cream has saved me more than once when I’ve forgotten about a potluck contribution.
Whether you’re a chocolate enthusiast or simply looking to elevate your breakfast game, these Chocolate Pancakes deliver on all fronts. Now, let’s dive into exactly what you’ll need to create this morning masterpiece!
Ingredients for Perfect Chocolate Pancakes
For the Dry Mix
- 1½ cups all-purpose flour – The backbone of our pancakes, providing structure while maintaining tenderness. For a lighter texture, you can substitute up to half with cake flour. For gluten-free options, a 1:1 gluten-free baking mix works well.
- ⅓ cup unsweetened cocoa powder – This is where the magic happens! Look for Dutch-processed cocoa for a smoother, richer chocolate flavor. Natural cocoa works too but will give a slightly different flavor profile.
- 3 tablespoons granulated sugar – Balances the bitterness of the cocoa without making the pancakes overly sweet. Coconut sugar makes a wonderful alternative with caramel notes.
- 1½ teaspoons baking powder – Provides the primary lift for fluffy pancakes. Make sure it’s fresh for best results!
- ½ teaspoon baking soda – Works with the buttermilk to create additional rise and tenderness.
- ½ teaspoon salt – Don’t skip this! Salt enhances the chocolate flavor and balances sweetness.
- ¼ teaspoon espresso powder (optional) – My secret ingredient that intensifies the chocolate flavor without adding coffee taste. Instant coffee works in a pinch.
For the Wet Mix
- 1¼ cups buttermilk – Creates tender pancakes with a slight tanginess that complements the chocolate. No buttermilk? Add 1 tablespoon of vinegar or lemon juice to regular milk and let stand for 5 minutes.
- 2 large eggs – Provides structure and richness. For egg-free versions, 2 flax eggs (2 Tbsp ground flaxseed mixed with 5 Tbsp water) work surprisingly well.
- 3 tablespoons unsalted butter, melted and slightly cooled – Adds richness and helps create those crispy edges. For dairy-free options, melted coconut oil creates a wonderful subtle flavor.
- 1 teaspoon pure vanilla extract – Enhances the chocolate flavor. Real extract makes a noticeable difference here.
Mix-Ins and Toppings (Optional)
- ½ cup chocolate chips – For extra chocolate pockets. Mini chips distribute more evenly throughout the batter.
- Fresh berries – Raspberries or strawberries provide a perfect tart contrast to the rich chocolate.
- Whipped cream – Homemade is best, with just a touch of sugar and vanilla.
- Maple syrup or chocolate sauce – For drizzling. Try a mix of both for chocolate-lover’s heaven!
- Chopped nuts – Toasted walnuts or hazelnuts add wonderful texture and complement the chocolate.
How to Make Your Chocolate Pancakes
Preparing the Batter
- Mix the dry ingredients: In a large bowl, whisk together the flour, cocoa powder, sugar, baking powder, baking soda, salt, and espresso powder (if using). This thorough mixing ensures even distribution of the leavening agents and prevents bitter cocoa pockets. The mixture should be uniform in color with no streaks of cocoa visible.
- Combine the wet ingredients: In a separate bowl, whisk together the buttermilk, eggs, melted butter, and vanilla extract until smooth and well incorporated. The mixture should look uniform with no streaks of egg visible.
- Create the perfect batter: Make a well in the center of the dry ingredients and pour in the wet mixture. Using a wooden spoon or rubber spatula, gently fold everything together until just combined. The batter should look somewhat lumpy with no dry flour pockets – those small lumps are your ticket to tender pancakes! If you’re adding chocolate chips, fold them in now with just 2-3 strokes.
- Rest the batter: Allow your batter to rest for 5-10 minutes. This important step gives the flour time to hydrate and the leavening agents time to activate. You’ll notice the batter becoming slightly airier and thicker – that’s perfect!
Cooking Your Chocolate Pancakes
- Prepare your cooking surface: Heat a griddle or non-stick skillet over medium heat. To test if it’s ready, sprinkle a few drops of water on the surface – they should dance and evaporate quickly. Lightly grease the surface with butter or a neutral oil. Too hot and your pancakes will burn outside while remaining raw inside; too cool and they’ll spread too much and become tough.
- Pour and cook: Using a ¼-cup measure for consistent sizing, pour batter onto the hot griddle. Leave enough space between pancakes for easy flipping. When bubbles form on the surface and the edges look set (about 2-3 minutes), it’s time to flip! The first side should be set with a few matte spots.
- Flip with confidence: In one decisive movement, slide your spatula completely under the pancake and flip. The second side will cook more quickly, usually 1-2 minutes. The pancake is done when it springs back slightly when touched in the center. If you’re uncertain, you can peek at the underside – it should be golden brown with darker spots.
- Keep them warm: Transfer cooked pancakes to a wire rack set over a baking sheet in a 200°F oven. Unlike stacking them directly on a plate, this method prevents them from becoming soggy while you finish cooking the batch.
Serving Your Chocolate Pancakes
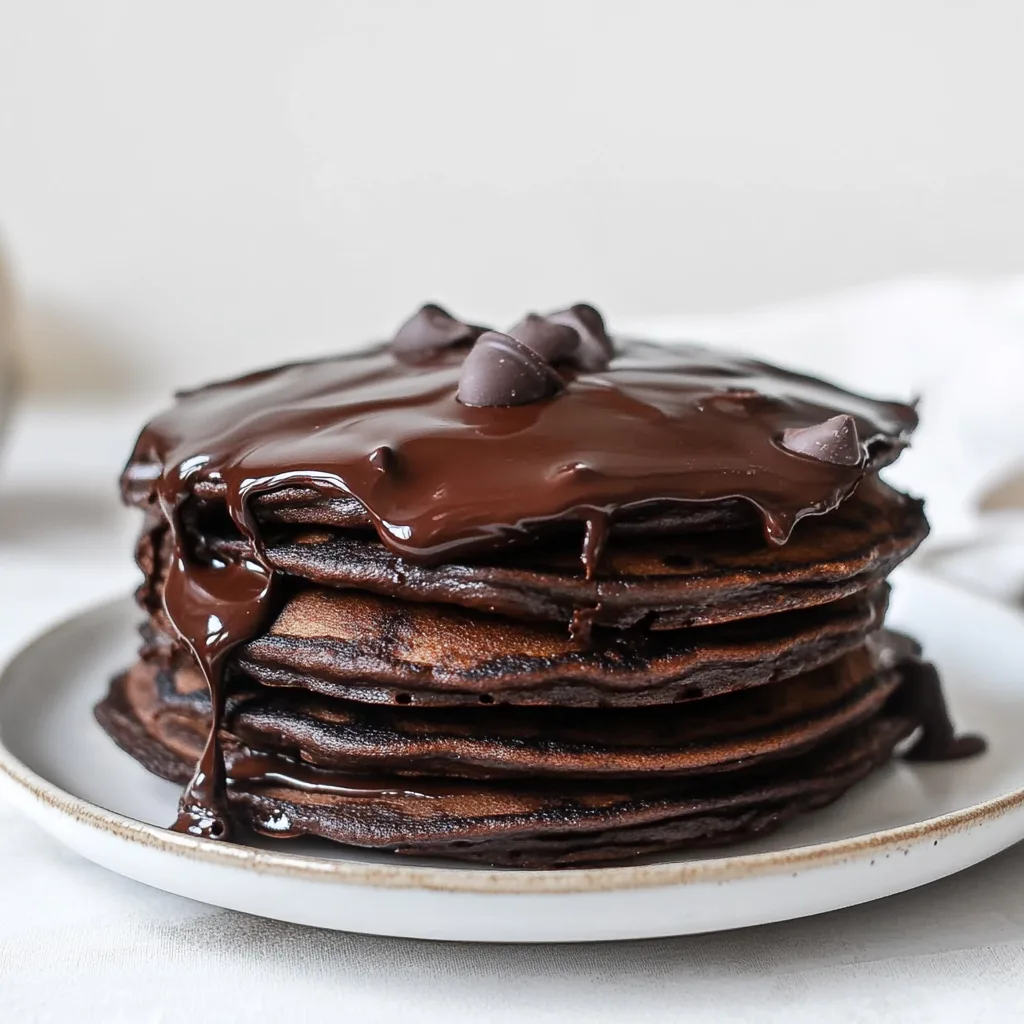
- Create your perfect stack: Arrange 3-4 Chocolate Pancakes per serving. If you want that perfect Instagram-worthy melted butter look, place a small pat between each pancake while they’re still hot.
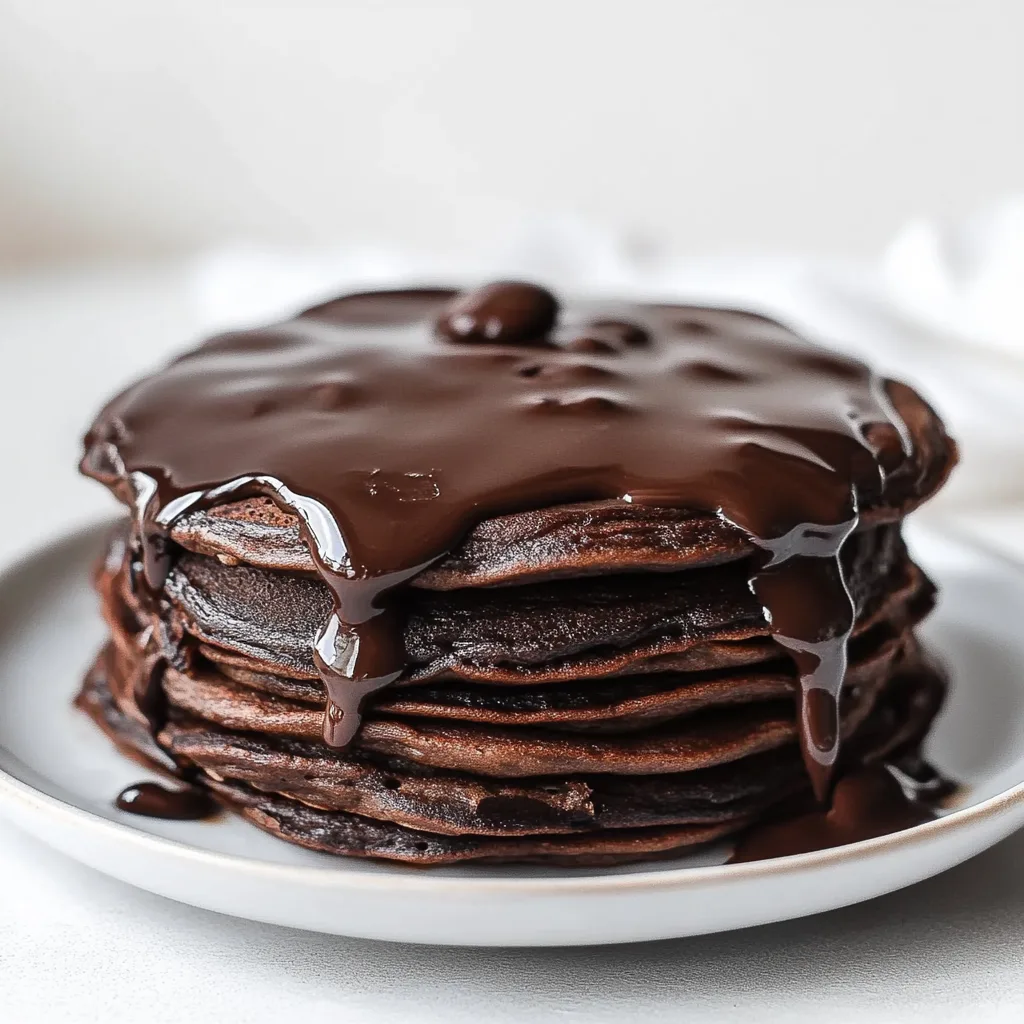
- Add the finishing touches: Drizzle with maple syrup, dust with powdered sugar, or top with whipped cream and berries as desired. For special occasions, add a sprinkle of chocolate shavings or a light drizzle of warm chocolate sauce.
Delicious Variations of Chocolate Pancakes
Double Chocolate Chunk
Take these Chocolate Pancakes to the extreme by folding ¾ cup of chopped dark chocolate into the batter and serving with chocolate sauce instead of maple syrup. The chunks create pockets of melted chocolate that literally burst in your mouth. This variation transforms breakfast into a celebration – perfect for birthdays or special achievements!
Mexican Hot Chocolate Inspired
Add ½ teaspoon of cinnamon and a pinch of cayenne pepper to the dry ingredients. This surprising combination creates warmth and depth that makes these Chocolate Pancakes reminiscent of traditional Mexican hot chocolate. Top with cinnamon whipped cream and a light dusting of cayenne for brave souls!
Black Forest Experience
Fold ½ cup of chopped fresh or frozen (thawed and drained) cherries into the batter just before cooking. Serve these Chocolate Pancakes topped with cherry compote and a dollop of whipped cream for a breakfast version of the classic German dessert. The tartness of the cherries perfectly balances the rich chocolate.
Chocolate-Orange Bliss
Add the zest of one orange to your dry ingredients and replace the vanilla extract with orange extract. The bright citrus notes cut through the richness of these Chocolate Pancakes, creating a sophisticated flavor profile. Top with candied orange peel for an elegant brunch presentation.
Nutella Stuffed Surprise
Make slightly larger pancakes with thicker batter (reduce buttermilk by 2 tablespoons). Pour a small circle of batter, add a teaspoon of Nutella in the center, then cover with more batter. Cook a bit more slowly to ensure the center heats through. The warm, molten hazelnut center of these Chocolate Pancakes creates an unforgettable breakfast experience.
Mint Chocolate Chip
Add ¼ teaspoon of mint extract to the wet ingredients and fold in mini chocolate chips or chopped Andes mints. These refreshing Chocolate Pancakes taste like dessert for breakfast in the best possible way. Top with a small scoop of mint chocolate chip ice cream for special occasions!

Chocolate Pancakes
Equipment
- Large mixing bowls
Ingredients
For the Dry Mix
- 1½ cups all-purpose flour
- ⅓ cup unsweetened cocoa powder preferably Dutch-processed
- 3 tablespoons granulated sugar
- 1½ teaspoons baking powder
- ½ teaspoon baking soda
- ½ teaspoon salt
- ¼ teaspoon espresso powder optional
For the Wet Mix
- 1¼ cups buttermilk or milk + 1 tbsp vinegar/lemon juice
- 2 large eggs
- 3 tablespoons unsalted butter melted
- 1 teaspoon pure vanilla extract
Optional Mix-ins & Toppings
- ½ cup chocolate chips
- Fresh berries strawberries, raspberries
- Whipped cream
- Maple syrup or chocolate sauce
- Chopped toasted nuts
Instructions
Prepare the Batter
- 1️⃣ Mix Dry Ingredients: In a large bowl, whisk together flour, cocoa powder, sugar, baking powder, baking soda, salt, and espresso powder.
- 2️⃣ Mix Wet Ingredients: In a separate bowl, whisk together buttermilk, eggs, melted butter, and vanilla extract until smooth.
- 3️⃣ Combine: Make a well in the dry ingredients, pour in the wet, and gently fold until just combined. Some lumps are okay!
- 4️⃣ Rest the Batter: Let sit for 5-10 minutes for fluffier pancakes.
Cook the Pancakes
- 5️⃣ Heat a skillet/griddle over medium heat and lightly grease it.
- 6️⃣ Pour Batter: Use a ¼-cup measure to drop batter onto the skillet.
- 7️⃣ Flip When Ready: When bubbles appear and edges look set (about 2-3 minutes), flip. Cook for another 1-2 minutes.
- 8️⃣ Keep Warm: Place pancakes on a wire rack in a 200°F oven while cooking the rest.
Serve & Enjoy!
- 9️⃣ Stack the pancakes and top with butter, syrup, berries, or whipped cream. Enjoy warm!
Notes
- Double Chocolate Chunk: Add chopped dark chocolate to the batter.
- Mexican Hot Chocolate: Add ½ teaspoon cinnamon + a pinch of cayenne.
- Black Forest Style: Fold in chopped cherries & top with cherry compote.
- Chocolate-Orange Bliss: Add orange zest and replace vanilla with orange extract.
- Nutella Surprise: Stuff pancakes with Nutella for a molten center.
- Mint Chocolate Chip: Add ¼ tsp mint extract + mini chocolate chips.
Nutrition
Frequently Asked Questions About Chocolate Pancakes
Can I make the batter the night before?
While it’s best to cook Chocolate Pancakes from freshly made batter, you can prepare the dry and wet ingredients separately the night before. Store the dry mix covered on the counter and the wet ingredients tightly covered in the refrigerator. In the morning, bring the wet ingredients to room temperature for about 15 minutes, then combine with the dry ingredients just before cooking. This method saves time while still ensuring the leavening agents work properly for fluffy pancakes.
Why are my Chocolate Pancakes flat instead of fluffy?
The most common culprits for flat Chocolate Pancakes are overmixing the batter (which develops gluten and makes them tough) or using expired leavening agents. Remember to mix just until combined – those lumps are good! Also, test your baking powder by adding a teaspoon to hot water; it should bubble vigorously. Finally, make sure your cooking surface is at the right temperature – too low and the pancakes will spread too much before setting.
How can I make these Chocolate Pancakes dairy-free?
These can easily become dairy-free Chocolate Pancakes! Replace the buttermilk with any plant-based milk plus 1 tablespoon of vinegar or lemon juice. For the butter, substitute an equal amount of melted coconut oil or vegan butter. The pancakes will have a slightly different flavor profile but will still be delicious. If using coconut oil, make sure all your ingredients are at room temperature to prevent the oil from solidifying when it hits cold ingredients.
Can I freeze leftover Chocolate Pancakes?
Absolutely! Once completely cooled, place your Chocolate Pancakes in a single layer on a baking sheet and freeze until solid (about 1 hour). Then transfer them to a freezer bag with parchment paper between layers. They’ll keep for up to 2 months. To reheat, either microwave for 20-30 seconds per pancake or toast them for a crisper exterior. Never refreeze previously frozen pancakes.
What can I use instead of buttermilk?
If you don’t have buttermilk on hand, you have several options for these Chocolate Pancakes. The easiest substitute is adding 1 tablespoon of white vinegar or lemon juice to regular milk and letting it sit for 5 minutes. Plain yogurt thinned with a little milk to reach the right consistency works well too. Even dairy-free alternatives like almond or oat milk can be “buttermilk-ified” with the acid method.
My cocoa is clumping in the batter. How can I prevent this?
Cocoa powder tends to clump, which can lead to bitter pockets in your Chocolate Pancakes. To prevent this, sift the cocoa powder before measuring, or whisk it thoroughly with the other dry ingredients. Another trick is to make a paste with the cocoa powder and a small amount of the warm melted butter before adding it to the wet ingredients. This ensures smooth distribution of that chocolate flavor throughout your pancakes.
A Sweet Conclusion
Last winter, during a particularly difficult week when everything seemed to be going wrong, my daughter surprised me by taking over the kitchen one Sunday morning. I walked in to find her carefully flipping these Chocolate Pancakes, her face a mask of concentration. “You always make these when someone needs cheering up,” she explained, “so I thought you might need them today.” That stack of slightly imperfect Chocolate Pancakes remains one of the most memorable meals I’ve ever eaten.
There’s something about chocolate for breakfast that feels simultaneously rebellious and comforting – breaking the rules in the most delicious way possible. These Chocolate Pancakes honor the traditional pancake methods our grandparents might have used, but with a contemporary twist that makes breakfast feel special again.
As you create your own stack of these chocolatey treasures, I encourage you to play with the recipe. Add your favorite mix-ins, experiment with toppings, or serve them in unexpected ways. The best recipes evolve with each kitchen they visit, collecting new stories and adaptations along the way.
When you take that first bite of tender, chocolate-infused goodness, I hope it brings a moment of pure joy to your morning – a small reminder that sometimes the simplest pleasures, like Chocolate Pancakes shared with people you care about, can transform an ordinary day into something extraordinary. After all, isn’t that what good food is really about? Not just nourishing our bodies, but feeding our connections, our traditions, and our memories.