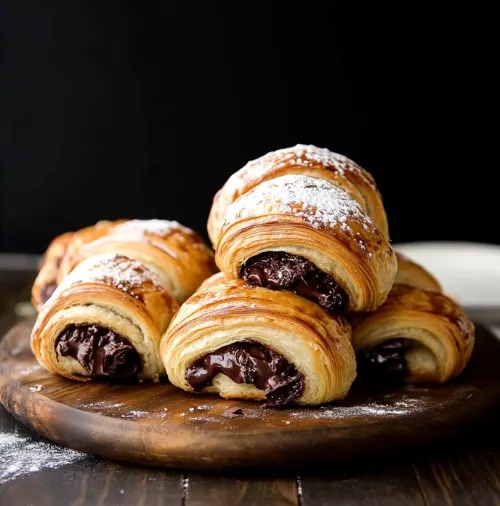
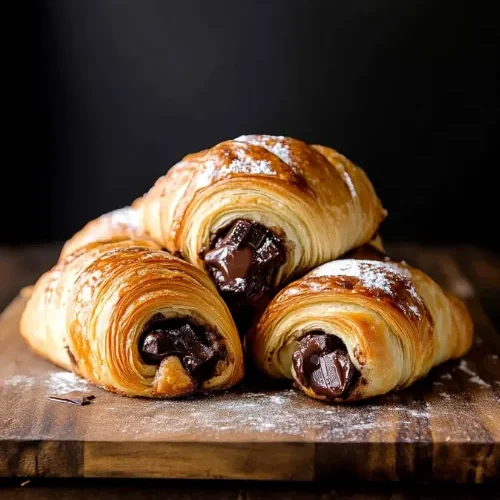
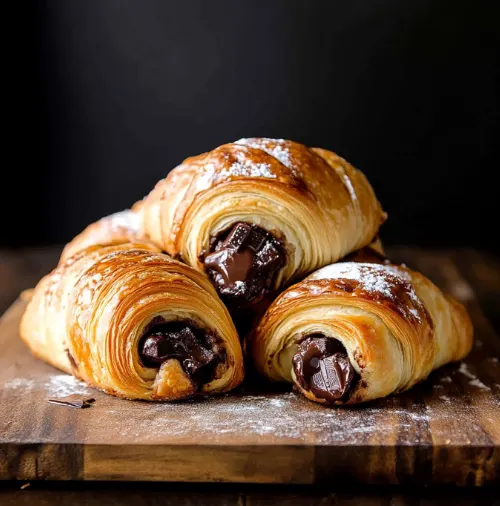
There’s something magical about biting into a perfectly baked homemade chocolate croissant on a lazy weekend morning. The crisp, golden exterior giving way to buttery, flaky layers wrapped around rich melted chocolate has been my weekend ritual for years. Making homemade chocolate croissants might seem intimidating at first, but I’m here to tell you that this recipe simplifies the process while delivering bakery-quality results every time. The delicate balance of butter-rich dough and premium chocolate creates an unforgettable breakfast treat that will have your family gathering at the kitchen counter before they’re even out of the oven. Keep reading to discover how you can master this French pastry classic in your own kitchen—no culinary degree required!
Why You’ll Love This Recipe
If you’ve ever been intimidated by the thought of making homemade chocolate croissants, this recipe is about to change everything. Unlike traditional methods that require precise technique and timing, this approach is wonderfully forgiving for beginners while still impressing experienced bakers.
I still remember my first attempt at making homemade chocolate croissants years ago. The dough was tough, the chocolate leaked everywhere, and what came out of the oven barely resembled croissants. After countless test batches and refinements, this recipe emerged as my foolproof method that delivers perfect results every time. Just last month, I served these at a family brunch, and my grandmother—who rarely compliments anything—declared them “better than the French bakery downtown.”
What makes these homemade chocolate croissants truly special is their adaptability. Whether you’re making them for a special occasion breakfast or prepping them ahead for busy mornings, this recipe fits seamlessly into your schedule. You can adjust the sweetness, experiment with different chocolate varieties, or even incorporate unexpected flavors like orange zest or cardamom.
Now, let’s dive into exactly what you’ll need to create these buttery, chocolate-filled delights in your own kitchen.

Ingredients
For the Croissant Dough
- 3 cups all-purpose flour – The foundation of our homemade chocolate croissants. I recommend using unbleached flour for a more developed flavor, though regular all-purpose works perfectly fine. For a more authentic texture, European-style flour with a higher protein content creates even flakier layers.
- 1/4 cup granulated sugar – Provides just enough sweetness without overpowering the buttery flavor. You can reduce to 3 tablespoons if you prefer less sweet pastries.
- 2 1/4 teaspoons active dry yeast – Ensures proper rise and texture. Instant yeast can be substituted and doesn’t require activation.
- 1 teaspoon salt – Fine sea salt balances the sweetness and enhances the buttery flavor. Don’t skip this!
- 1 cup cold milk – Adds richness while keeping the dough temperature low. Whole milk produces the best results, though 2% works in a pinch. Plant-based alternatives like almond milk can work but may slightly alter the flavor.
- 2 tablespoons unsalted butter, melted – Adds initial richness to the dough base. Use European-style butter with higher fat content if available.
For the Butter Layer
- 1 1/4 cups (2 1/2 sticks) cold unsalted butter – This is where the magic happens in homemade chocolate croissants! The butter creates those distinctive flaky layers. European or cultured butter makes a noticeable difference in flavor, but any high-quality unsalted butter works well. Keep it as cold as possible until ready to use.
- 2 tablespoons all-purpose flour – Helps stabilize the butter layer during folding.
For the Filling and Finish
- 8 ounces high-quality semi-sweet chocolate – Choose chocolate with 55-70% cocoa for the best balance of sweetness and depth. Chocolate bars or batons specifically made for baking work better than chips as they melt beautifully without separating. For those avoiding dairy, dark chocolate with higher cocoa content makes a great substitute.
- 1 large egg (for egg wash) – Creates that gorgeous golden shine on your homemade chocolate croissants. For an egg-free version, brush with heavy cream.
- 1 tablespoon water (for egg wash) – Thins the egg for easier application.
- Coarse sugar for sprinkling (optional) – Adds a delightful crunch and sparkle. Pearl sugar is traditional but turbinado or demerara sugar works beautifully.
How to Make Homemade Chocolate Croissants
Step 1: Prepare the Dough Base
- In a large bowl, combine the flour, sugar, yeast, and salt. Whisk thoroughly to incorporate air and evenly distribute ingredients.
- Make a well in the center of your dry ingredients and pour in the cold milk and melted butter. Stir with a wooden spoon until a shaggy dough forms. The mixture should be slightly sticky but hold together when pressed.
- Turn the dough onto a lightly floured surface and knead for 3-4 minutes until smooth and elastic. The dough should spring back slightly when pressed with your finger – this indicates proper gluten development.
- Form the dough into a rectangle roughly 1-inch thick, wrap tightly in plastic wrap, and refrigerate for at least 1 hour or overnight. This resting period allows the gluten to relax and the yeast to slowly develop flavor.
Step 2: Prepare the Butter Layer
- Place the cold butter between two sheets of parchment paper. Using a rolling pin, pound and roll the butter into an 8×5-inch rectangle about 1/4-inch thick. If the butter becomes too soft at any point, return it to the refrigerator for 10-15 minutes.
- Sprinkle the 2 tablespoons of flour over the butter rectangle and fold the parchment paper to incorporate it completely. This flour helps stabilize the butter during folding.
- Return the shaped butter to the refrigerator to firm up while you roll out the dough. The butter should be pliable but cold – similar to the consistency of the dough.
Step 3: Laminate the Dough
- On a lightly floured surface, roll the chilled dough into a 16×10-inch rectangle. Position it so the longer side is facing you.
- Place the chilled butter block in the center of the dough, then fold the left and right sides of the dough over the butter like an envelope, pinching the seams to seal completely. Your butter should be fully encased.
- Turn the dough 90 degrees and gently roll it into a 15×10-inch rectangle. Be careful not to press too hard – you’re trying to extend the dough without squeezing out the butter.
- Fold the dough in thirds like a business letter: bring the bottom third up, then fold the top third down over it. This completes your first “turn.” Wrap the dough in plastic wrap and refrigerate for 1 hour.
- Repeat this rolling and folding process two more times, chilling the dough for 1 hour between each turn. After the third turn, refrigerate the dough overnight or for at least 4 hours. This extended rest allows the gluten to relax completely and the yeast to develop more complex flavors.
Step 4: Shape and Fill the Croissants
- Cut the chocolate into 3-inch batons about 1/2-inch wide, or use specialty chocolate batons designed for homemade chocolate croissants. Having your chocolate ready before rolling the dough ensures efficient assembly.
- On a lightly floured surface, roll the chilled dough into a large rectangle approximately 20×15 inches and about 1/8-inch thick. Use gentle, even pressure to maintain the integrity of the butter layers.
- Trim the edges with a sharp knife or pizza cutter to create clean lines. This exposes those beautiful butter layers and ensures even baking.
- Cut the dough into 4-inch wide triangles with a 5-inch base. For traditional homemade chocolate croissants, you’ll need rectangles instead – cut the dough into 4×5-inch rectangles.
- Place chocolate at the wide end of each triangle (or in the center of each rectangle). For rectangles, fold the shorter ends in slightly, then roll up from one long side to the other, ensuring the chocolate stays enclosed.
- Place the shaped croissants on parchment-lined baking sheets, leaving at least 2 inches between each pastry to allow for expansion. The tip of the triangle should be tucked underneath to prevent unraveling during baking.
Step 5: Proof and Bake
- Loosely cover the shaped homemade chocolate croissants with plastic wrap or a clean kitchen towel and let them rise at room temperature for 1.5-2 hours, until noticeably puffy. They won’t double in size but should look expanded and feel light to the touch.
- Preheat your oven to 375°F (190°C) with racks positioned in the upper and lower thirds.
- Whisk together the egg and water to create an egg wash. Gently brush this over the proofed croissants, being careful not to deflate them. The egg wash gives your homemade chocolate croissants that signature golden sheen.
- If desired, sprinkle with coarse sugar for added texture and sweetness.
- Bake for 20-25 minutes, rotating and switching the pans halfway through, until deeply golden brown. Look for a rich amber color rather than light gold – this ensures the layers are fully baked. When done, the croissants should feel light and sound hollow when tapped on the bottom.
- Transfer to a wire rack to cool for at least 20 minutes before serving. The chocolate inside will be extremely hot immediately after baking.
Delicious Variations for Homemade Chocolate Croissants
Double Chocolate Indulgence
Mix 2 tablespoons of cocoa powder into your dough for a chocolate-on-chocolate experience. Use a combination of dark and milk chocolate for the filling to create complex flavor depths that satisfy serious chocolate lovers.
Orange-Chocolate Fusion
Add 1 tablespoon of fresh orange zest to your dough and brush the shaped croissants with a simple syrup infused with orange liqueur after baking. The bright citrus notes perfectly complement the rich chocolate in these homemade chocolate croissants.
Hazelnut Dream
Spread a thin layer of high-quality hazelnut spread alongside your chocolate batons before rolling. After baking, dust with cocoa powder and crushed toasted hazelnuts for a nutty variation that evokes Italian chocolate traditions.
Spiced Mocha Croissants
Add 1 teaspoon of espresso powder and 1/4 teaspoon of cinnamon to your dough. Use a mixture of chocolate and finely chopped coffee beans for the filling. These homemade chocolate croissants make for an eye-opening breakfast with complex, warming flavors.
Coconut-Chocolate Paradise
Mix 1/3 cup of finely shredded unsweetened coconut into your dough. Use a combination of chocolate and a thin layer of coconut cream for filling. After baking, glaze with a simple coconut milk icing for a tropical twist on traditional homemade chocolate croissants.

Homemade Chocolate Croissants
Equipment
- Large mixing bowl
Ingredients
For the Croissant Dough:
- 3 cups all-purpose flour
- 1/4 cup granulated sugar
- 2 1/4 teaspoons active dry yeast
- 1 teaspoon salt
- 1 cup cold milk
- 2 tablespoons unsalted butter melted
For the Butter Layer:
- 1 1/4 cups cold unsalted butter
- 2 tablespoons all-purpose flour
For the Filling and Finish:
- 8 ounces semi-sweet chocolate
- 1 large egg
- 1 tablespoon water
- Coarse sugar optional
Instructions
Prepare the Dough:
- In a large bowl, combine flour, sugar, yeast, and salt.
- Add cold milk and melted butter. Mix until a shaggy dough forms.
- Knead for 3-4 minutes until smooth.
- Wrap and refrigerate for 1 hour.
Prepare the Butter Layer:
- Place cold butter between parchment paper and roll into an 8×5-inch rectangle.
- Sprinkle with flour and fold to incorporate.
- Chill while the dough rests.
Laminate the Dough:
- Roll the dough to 16×10 inches.
- Place butter in the center and fold dough over like an envelope.
- Roll out and fold into thirds. Repeat 3 times, chilling for 1 hour between turns.
Shape the Croissants:
- Roll dough into a 20×15-inch rectangle and cut into 4×5-inch rectangles.
- Place chocolate in the center, fold, and roll.
- Arrange on a lined baking sheet.
Proof and Bake:
- Let rise for 1.5-2 hours until puffy.
- Preheat oven to 375°F.
- Brush with egg wash and sprinkle sugar if desired.
- Bake for 20-25 minutes until golden brown.
Notes
- For a twist, add orange zest, hazelnut spread, or espresso powder.
- Dark chocolate (70% cocoa) offers a luxurious flavor.
- Croissants are best enjoyed fresh but can be frozen and reheated.
Nutrition
Frequently Asked Questions
Can I make homemade chocolate croissants ahead of time?
Absolutely! You can prepare the dough through the final shaping, then freeze the unbaked croissants on a baking sheet. Once frozen solid, transfer to a freezer bag where they’ll keep for up to 3 months. When ready to bake, place on a parchment-lined sheet, cover loosely, and let thaw and proof overnight in the refrigerator. Allow them to come to room temperature for about an hour before baking as directed. Alternatively, you can refrigerate the shaped, unbaked homemade chocolate croissants overnight, covered with plastic wrap, and bake them fresh in the morning.
Why did my butter leak out during baking?
This common issue usually happens when the butter gets too warm during the lamination process. Ensure your dough and butter stay cool throughout – if the dough feels soft or the butter begins to ooze at any point, return everything to the refrigerator for 15-20 minutes. Also, make sure your oven is fully preheated before baking your homemade chocolate croissants.
Can I use chocolate chips instead of chocolate bars?
While chocolate chips are convenient, they contain stabilizers that prevent them from melting as smoothly as chocolate bars or batons. If chocolate chips are your only option, choose mini chips and toss them with 1/2 teaspoon of flour before using to help them stay in place during baking. For the best results in homemade chocolate croissants, chocolate bars broken into pieces or specialty chocolate batons are ideal.
How do I store leftover croissants?
Store completely cooled homemade chocolate croissants in an airtight container at room temperature for up to 2 days. For longer storage, freeze in a single layer until solid, then transfer to a freezer bag for up to 1 month. Refresh before serving by warming in a 300°F oven for 5-7 minutes. Avoid refrigerating croissants as this accelerates staling.
Can I make these without dairy?
Yes! Replace the milk with almond, oat, or soy milk. For the butter, use a high-quality plant-based butter substitute specifically designed for baking. Look for brands that come in block form rather than tub spreads. Be sure your chocolate is dairy-free as well. The texture may be slightly different, but you can still achieve delicious homemade chocolate croissants without dairy products.
Is it necessary to do three turns of the dough?
Three turns create the optimal number of layers for traditional homemade chocolate croissants. While you could technically get away with two turns, the result won’t have quite the same flakiness. More than three turns can make the layers too thin, causing them to merge during baking. If you’re short on time, two turns will still yield good results, but for authentic texture, the full three turns are recommended.
A Lasting Tradition
The aroma of homemade chocolate croissants baking will transform your kitchen into something truly special – a place where time slows down and everyday moments become memorable. I’ve made these countless times over the years, from quiet Sunday mornings alone to festive holiday breakfasts with extended family, and they never fail to create a sense of occasion.
What I love most about these homemade chocolate croissants is how they balance tradition with accessibility. While honoring the classic French techniques that make croissants special, this recipe adapts the process to fit modern home kitchens and busy schedules. The texture creates perfect pockets to catch the melted chocolate, while the buttery layers provide a satisfying contrast to the rich filling.
When my niece had her first bite of these homemade chocolate croissants last Christmas, her eyes widened with the kind of joy that makes all the folding and waiting worthwhile. That’s the true magic of baking – creating something with your hands that brings happiness to those around your table. I hope these croissants become part of your own family traditions, adapted to your tastes and preferences, but always bringing the same sense of warmth and connection that makes sharing food so meaningful.

