

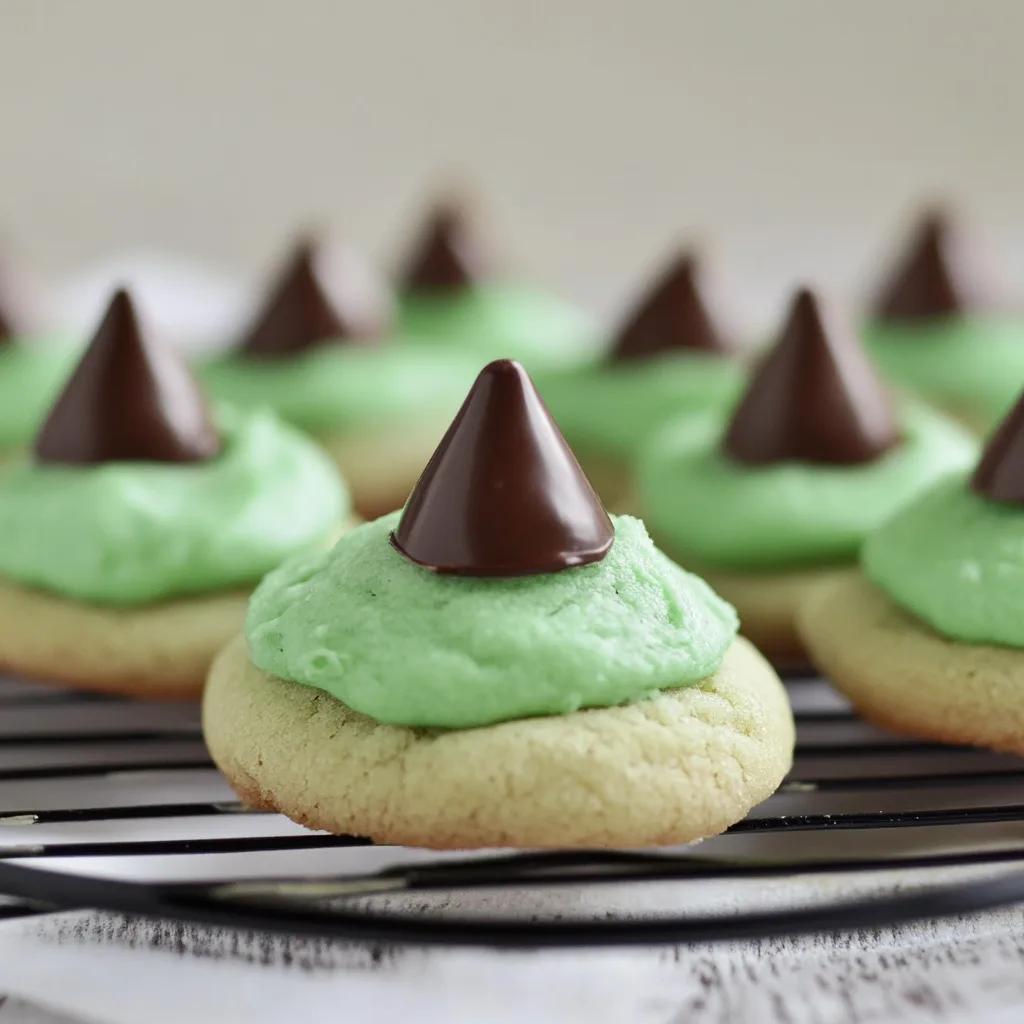
There’s something absolutely magical about the moment you pull a tray of Mint Chocolate Kiss Blossom Cookies from the oven, watching as the chocolate kisses slowly melt into the warm, soft cookie beneath them. I’ve been perfecting this recipe for years, and it has become my signature holiday contribution to every gathering. What makes these Mint Chocolate Kiss Blossom Cookies truly special is the perfect balance between the buttery, tender sugar cookie base and the cool, refreshing mint chocolate that creates an irresistible flavor combination. As they bake, your kitchen fills with an intoxicating aroma that blends sweet vanilla, rich chocolate, and invigorating mint – a scent that instantly transports you to the most wonderful time of the year. The cookies themselves are a visual delight too, with their crackled sugar coating and glossy chocolate kisses creating a beautiful contrast that makes them stand out on any cookie platter. Keep reading to discover how to create these crowd-pleasing Mint Chocolate Kiss Blossom Cookies that will become your new holiday tradition!
Why You’ll Love This Recipe
If you’ve ever struggled with timing the perfect cookie – not too soft, not too crisp – these Mint Chocolate Kiss Blossom Cookies solve that problem beautifully. Unlike traditional methods that require precise technique, this recipe is wonderfully forgiving and produces consistently perfect results. The distinctive “crackle” pattern on top serves as a visual indication that they’re baked to perfection, taking the guesswork out of cookie baking.
I still remember the first time I brought these Mint Chocolate Kiss Blossom Cookies to my family’s annual Christmas cookie exchange. My grandmother was skeptical until she tasted it and declared it a worthy twist on her classic peanut butter blossoms. “The mint makes it so refreshing,” she said, reaching for a second cookie. “It’s like a breath of fresh air among all the heavy holiday desserts.” Now they’re the first cookies to disappear from the sharing table every year!
What makes these Mint Chocolate Kiss Blossom Cookies so versatile is how easily they can be adapted throughout the year. While they’re perfect for Christmas with their festive appearance, you can easily transform them for Valentine’s Day with pink sugar coating, St. Patrick’s Day with green sugar, or Halloween with orange and black sprinkles. The mint-chocolate combination works beautifully year-round, making this a recipe you’ll return to again and again.
Now, let’s dive into exactly what you’ll need to create these delightful Mint Chocolate Kiss Blossom Cookies in your own kitchen.
Ingredients
For the Cookie Base:
- 2¼ cups all-purpose flour – This provides structure to the cookies. For a tender crumb, measure your flour correctly by spooning it into the measuring cup and leveling it off, rather than scooping directly from the bag. For a gluten-free alternative, use a 1:1 gluten-free flour blend with xanthan gum.
- ½ teaspoon baking soda – This leavening agent helps the cookies rise slightly while maintaining their dense, tender texture. It must be fresh for proper rising – check the expiration date!
- ½ teaspoon salt – Salt enhances the flavor of the cookies and balances the sweetness. I prefer fine sea salt for its clean taste, but table salt works perfectly well too.
- 1 cup (2 sticks) unsalted butter, softened – Butter provides richness and flavor to the Mint Chocolate Kiss Blossom Cookies. Make sure it’s genuinely softened to room temperature (should indent when pressed but not be melty) for proper creaming. For a dairy-free option, use a high-quality plant-based butter substitute.
- ¾ cup granulated sugar – This sweetens the cookie and helps create those characteristic cracks on the surface. The sugar also contributes to the cookies’ tender texture.
- ¾ cup light brown sugar, packed – Brown sugar adds moisture and a subtle molasses flavor that complements the mint chocolate. Dark brown sugar can be substituted for a more pronounced molasses flavor.
- 1 large egg – This binds the ingredients together and adds structure. For an egg-free version, you can substitute a flax egg (1 tablespoon ground flaxseed mixed with 3 tablespoons water, allowed to thicken).
- 1 large egg yolk – The extra yolk makes these cookies exceptionally tender and rich. You can save the egg white for another use or omit if necessary.
- 2 teaspoons vanilla extract – Vanilla enhances all the other flavors in the cookie. Use pure vanilla extract rather than imitation for the best flavor.
- ½ teaspoon mint extract – This adds a subtle mint flavor to the cookie dough that complements the mint chocolate kisses. Be careful not to add too much – mint extract is potent!
For Rolling and Topping:
- ⅓ cup granulated sugar – For rolling the cookie dough balls before baking. This creates a sweet, slightly crunchy exterior and those beautiful cracks as the cookies bake and expand.
- 48 Mint Chocolate Kisses (unwrapped) – These are the star of the Mint Chocolate Kiss Blossom Cookies! You’ll need approximately one 9-oz bag. Unwrap them before you start baking so they’re ready to press into the cookies as soon as they come out of the oven. If mint chocolate kisses aren’t available, regular chocolate kisses work well too, or you can substitute mint chocolate wafers or even Andes mints cut in half.
Optional Decorative Elements:
- Green sanding sugar – For a festive appearance, you can mix this with the granulated sugar used for rolling.
- Holiday sprinkles – These can be added to the cookies immediately after pressing in the kisses, while the chocolate is still warm enough for them to stick.
How to Make Mint Chocolate Kiss Blossom Cookies
Step 1: Prepare the Dough
- In a medium bowl, whisk together the flour, baking soda, and salt. This ensures even distribution of the leavening agent and salt throughout the dough, preventing any “salty spots” in your finished cookies.
- In a large bowl or the bowl of a stand mixer fitted with the paddle attachment, cream together the softened butter, granulated sugar, and brown sugar on medium speed for 2-3 minutes. The mixture should become light and fluffy – this is crucial for the texture of your Mint Chocolate Kiss Blossom Cookies. You’ll know it’s ready when the color lightens notably and the texture looks almost whipped.
- Add the egg, egg yolk, vanilla extract, and mint extract to the butter-sugar mixture. Beat on medium speed until fully incorporated and smooth, about 1 minute. Scrape down the sides of the bowl with a rubber spatula to ensure everything is well mixed.
- With the mixer on low speed, gradually add the flour mixture to the wet ingredients. Mix just until the flour disappears – overmixing will develop the gluten and make the cookies tough. The dough should be soft but not sticky.
- Cover the dough with plastic wrap, pressing it directly onto the surface of the dough to prevent it from drying out. Refrigerate for at least 1 hour or up to 24 hours. This chilling step is essential for preventing the cookies from spreading too much and for developing flavor.

Step 2: Shape and Bake
- When ready to bake, preheat your oven to 350°F (175°C). Line baking sheets with parchment paper or silicone baking mats.
- Place the ⅓ cup of granulated sugar in a small bowl for rolling. If using colored sugar or sprinkles, you can mix them in now.
- Remove the dough from the refrigerator and let it sit at room temperature for about 10 minutes to soften slightly for easier handling.
- Using a cookie scoop or tablespoon, portion the dough into balls about 1½ inches in diameter (approximately 1 tablespoon of dough each). You should get around 48 cookies from this recipe.
- Roll each dough ball between your palms to make it smooth, then roll in the sugar until completely coated. Place on the prepared baking sheets, spacing them about 2 inches apart.
- Bake for 8-10 minutes, until the cookies are set around the edges but still soft in the center. The perfect visual cue: they should have a crackled appearance on top but should not be browned. If they brown, they’ll become too crisp.
Step 3: Add the Chocolate Kisses
- While the cookies are baking, unwrap all your chocolate kisses so they’re ready to go. Working quickly is key here!
- Remove the cookies from the oven and let them rest on the baking sheet for exactly 2 minutes. They should be set enough to hold their shape but still very warm.
- Gently press a mint chocolate kiss into the center of each cookie. Press down just enough for it to stick – about halfway into the cookie. The cookie will crack slightly around the edges, creating that classic blossom appearance.
- If adding sprinkles for decoration, sprinkle them around the chocolate kiss immediately while it’s still warm enough for them to stick.
- Let the cookies cool on the baking sheet for 5 minutes, then transfer to a wire rack to cool completely. The chocolate kisses will retain their shape but become soft. They’ll firm up again as the cookies cool.
Step 4: Storage
- Once completely cooled (this takes about 2 hours), store your Mint Chocolate Kiss Blossom Cookies in an airtight container at room temperature for up to 5 days, with parchment paper between layers to prevent sticking.
- For longer storage, these cookies freeze beautifully for up to 3 months. Thaw at room temperature before serving.
Variations
1. Chocolate Mint Chocolate Kiss Blossom Cookies
Transform these cookies by adding ¼ cup of cocoa powder to the flour mixture and reducing the flour by ¼ cup. This creates a chocolate cookie base that intensifies the chocolate-mint flavor profile. Roll in powdered sugar instead of granulated for a striking “crinkle cookie” appearance that highlights the contrast between the dark cookie and bright sugar coating.
2. Peppermint Mocha Blossom Cookies
Add 1 tablespoon of instant espresso powder dissolved in 1 teaspoon of hot water to the wet ingredients, along with 2 tablespoons of cocoa powder (removing 2 tablespoons of flour). Replace the mint extract with peppermint extract for a more intense peppermint flavor. Top with striped peppermint kisses for a festive coffee shop-inspired holiday cookie.
3. Mint Chocolate Kiss Thumbprint Cookies
Instead of waiting until after baking, create a thumbprint in each cookie ball before baking. Fill the indent with a small amount of chocolate ganache, then bake. Once cooled, place the mint kiss on top of the ganache. This creates a double-chocolate effect with a soft chocolate center and the mint kiss on top.
4. White Chocolate Mint Blossom Cookies
Add ¼ cup of white chocolate chips to the cookie dough and substitute regular mint chocolate kisses with white chocolate mint kisses. Roll the cookies in a mixture of granulated sugar and finely crushed candy canes for a beautiful red and white sparkle and extra mint flavor.
5. Orange-Mint Chocolate Kiss Blossom Cookies
Replace half of the vanilla extract with orange extract and add 1 tablespoon of fresh orange zest to the dough. The orange-mint-chocolate combination is sophisticated and unexpected, reminiscent of those chocolate oranges popular during the holidays. Roll in a mixture of sugar and orange zest for an extra citrus boost.
6. Mint Chocolate Kiss Sandwich Cookies
Make the cookies half the size (using about 2 teaspoons of dough per cookie) and bake for 6-7 minutes. Once cooled, spread a thin layer of mint buttercream (butter, powdered sugar, mint extract, and green food coloring) on the flat side of one cookie, then place a second cookie on top, flat side down. Press a mint chocolate kiss on top of each sandwich cookie, securing it with a small dab of melted chocolate.

Mint Chocolate Kiss Blossom Cookies
Equipment
- Mixing bowls
Ingredients
For the Cookie Base:
- 2¼ cups all-purpose flour
- ½ teaspoon baking soda
- ½ teaspoon salt
- 1 cup 2 sticks unsalted butter, softened
- ¾ cup granulated sugar
- ¾ cup light brown sugar packed
- 1 large egg
- 1 large egg yolk
- 2 teaspoons vanilla extract
- ½ teaspoon mint extract
For Rolling and Topping:
- ⅓ cup granulated sugar
- 48 Mint Chocolate Kisses unwrapped
- Optional Decorative Elements:
- Green sanding sugar
- Holiday sprinkles
Instructions
Step 1: Prepare the Dough
- Whisk together the flour, baking soda, and salt in a medium bowl.
- In a large bowl, cream butter, granulated sugar, and brown sugar on medium speed for 2-3 minutes until light and fluffy.
- Add the egg, egg yolk, vanilla extract, and mint extract. Beat until smooth.
- Gradually add the flour mixture to the wet ingredients, mixing until just combined.
- Cover and refrigerate for at least 1 hour.
Step 2: Shape and Bake
- Preheat oven to 350°F (175°C) and line baking sheets with parchment paper.
- Roll dough into 1½-inch balls and coat in granulated sugar.
- Place on baking sheets 2 inches apart and bake for 8-10 minutes.
- Let cool for 2 minutes on the baking sheet.
Step 3: Add the Chocolate Kisses
- Gently press a mint chocolate kiss into the center of each cookie.
- Allow to cool on the baking sheet for 5 minutes, then transfer to a wire rack.
Storage:
- Store in an airtight container at room temperature for up to 5 days.
- Freeze for up to 3 months.
Notes
- Prevent excessive spreading: Chill dough and use properly softened butter.
- Prevent kisses from melting too much: Let cookies cool for 3-4 minutes before adding kisses or chill them after assembly.
- Make ahead: Dough can be made 3 days in advance and refrigerated or frozen as pre-formed balls.
Nutrition
Frequently Asked Questions
Q: Why did my cookies spread too much?
A: The most common reason for excessive spreading is butter that’s too soft or dough that wasn’t chilled long enough. Make sure your butter is at cool room temperature (should indent when pressed but not be shiny or melty) and always chill the dough for at least an hour. Also, check that your baking soda is fresh, as expired leavening agents can affect cookie texture.
Q: Can I make the dough ahead of time?
A: Absolutely! The dough for Mint Chocolate Kiss Blossom Cookies can be made up to 3 days in advance and stored in the refrigerator. You can also form the dough balls and freeze them for up to 3 months. When ready to bake, just roll the frozen dough balls in sugar and add a minute or two to the baking time.
Q: My chocolate kisses are melting too much. How can I prevent this?
A: If your kisses are melting too quickly, your cookies might still be too hot when you add them. Try letting the cookies cool for 3-4 minutes instead of 2 before adding the kisses. Alternatively, you can place the baking sheet with cookies and kisses in the refrigerator for about 10 minutes to quickly set the chocolate.
Q: Can I make these Mint Chocolate Kiss Blossom Cookies without mint extract?
A: Yes! If you’re not a fan of mint or don’t have mint extract on hand, you can omit it from the cookie dough and use regular chocolate kisses instead of mint ones. You’ll still have delicious chocolate kiss cookies. Alternatively, try almond or orange extract for a different but equally delicious flavor profile.
Q: How do I store these cookies to keep them fresh?
A: Once completely cooled, store Mint Chocolate Kiss Blossom Cookies in an airtight container at room temperature with parchment paper between layers. They’ll stay fresh for 5-7 days. For longer storage, freeze in a single layer until solid, then transfer to freezer bags. They’ll keep for up to 3 months frozen.
Q: Why do I need to use both an egg and an egg yolk?
A: The extra egg yolk adds fat and emulsifiers, resulting in a more tender, rich cookie with the perfect chewy texture. If you need to omit it, the cookies will still work but won’t be quite as tender. You can substitute the single egg plus yolk with two whole eggs, but expect a slightly different texture in the finished cookie.
Conclusion
Every time I bake a batch of these Mint Chocolate Kiss Blossom Cookies, I’m reminded of that magical moment years ago when I was searching for “my signature cookie” – something that would become a tradition and create lasting memories. The first time I combined the gentle mint flavor with the classic blossom cookie format, I knew I had found something special that bridged tradition and innovation perfectly.
What I love most about sharing these Mint Chocolate Kiss Blossom Cookies is watching people’s faces as they take that first bite – the surprise at the refreshing hint of mint, followed by pure enjoyment as the flavors meld together. The texture creates perfect pockets to catch the flavorful ingredients, with the tender cookie base providing the ideal foundation for the creamy chocolate kiss that crowns each one.
The aroma will transform your kitchen into something special – that distinctive blend of butter, vanilla, mint, and chocolate that signals the holidays have truly arrived. Yet these cookies have a way of transcending seasons, bringing a bit of festive joy whenever they appear.
I encourage you to make this recipe your own. Perhaps you’ll add your family’s favorite extract in place of mint, or roll them in a special colored sugar that represents a celebration unique to your traditions. These cookies have a beautiful way of evolving while remaining recognizable – much like the best family traditions themselves.
In a world where we’re often rushing from one moment to the next, there’s something profoundly satisfying about creating something with your hands that brings such joy to others. So preheat that oven, gather your ingredients, and prepare to start a delicious new tradition with these Mint Chocolate Kiss Blossom Cookies – a small but meaningful gift of sweetness that connects us all.