
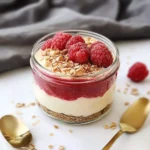
The first time I created these No Bake Protein Cheesecake Jars, I knew I had stumbled upon something special. There’s something magical about the way the velvety protein-packed filling sits atop the nutty, crumbly base, creating a symphony of textures that dance on your palate. These little jars of joy deliver all the decadent satisfaction of traditional cheesecake but with a nutritional profile that aligns perfectly with my fitness goals. The creamy, slightly tangy filling offers that distinct cheesecake flavor we all crave, while the subtle hint of vanilla and a whisper of sweetness make each spoonful an experience to savor. If you’ve been searching for a dessert that feels indulgent but supports your wellness journey, you’re in for a treat – these No Bake Protein Cheesecake Jars might just become your new obsession.
Why You’ll Love This No Bake Protein Cheesecake Jar
Have you ever found yourself standing in front of the refrigerator late at night, craving something sweet but feeling guilty about derailing your healthy eating plan? These No Bake Protein Cheesecake Jars have been my solution to that exact dilemma countless times. They satisfy that dessert craving while actually contributing to my daily protein intake – it’s like having your cheesecake and eating it too!
I’ll never forget serving these at a family gathering where my health-conscious cousin and my dessert-loving uncle were both present. I was nervous about pleasing such different palates, but to my surprise, both went back for seconds! My uncle even asked for the recipe, convinced there was no way something so delicious could be “healthy.” The look on his face when I revealed the protein content was priceless.
What makes these No Bake Protein Cheesecake Jars truly special is their incredible versatility. You can easily customize the flavor profile by swapping in different protein powder flavors, adding various fruit toppings, or changing up the base ingredients. They’re perfect for meal prep, portable for on-the-go snacking, and ideal for portion control. Plus, unlike traditional cheesecake that demands precise technique, this recipe is wonderfully forgiving – perfect for both novice cooks and seasoned chefs alike.
Now, let’s dive into exactly what you’ll need to create these delightful treats in your own kitchen.
Ingredients for No Bake Protein Cheesecake Jar
For the Crust Base:
- 1 cup almond flour: Creates a nutty, gluten-free foundation. If nut allergies are a concern, substituting graham cracker crumbs or crushed gluten-free cookies works beautifully.
- 2 tablespoons coconut oil, melted: Binds the crust ingredients together. Virgin coconut oil adds a subtle tropical note, while refined coconut oil provides binding without the coconut flavor.
- 1 tablespoon honey or maple syrup: Adds natural sweetness and helps the crust hold together. Choose raw honey for subtle floral notes or maple syrup for a deeper, caramel-like sweetness.
- 1/4 teaspoon cinnamon: Provides warmth and complexity. Ceylon cinnamon offers a milder, more nuanced flavor than the more common Cassia variety.
- Pinch of salt: Enhances all the flavors and balances sweetness. Pink Himalayan or sea salt are excellent choices.
For the Protein Cheesecake Filling:
- 8 oz cream cheese, softened: The foundation of our creamy filling. Choose full-fat for the most authentic cheesecake flavor, or light cream cheese for fewer calories. Room temperature cream cheese is essential for a smooth mixture.
- 1/4 cup Greek yogurt: Adds tanginess and protein while lightening the texture. I recommend 2% or full-fat for best results, but non-fat works if you prefer.
- 2 scoops (approximately 60g) vanilla protein powder: The hero ingredient that transforms this dessert into a protein-packed treat. Whey isolate creates the smoothest texture, but plant-based proteins work well for vegan versions.
- 3 tablespoons honey or maple syrup: Adds natural sweetness without refined sugar. Adjust to taste and according to the sweetness of your protein powder.
- 1 tablespoon lemon juice: Provides authentic cheesecake tang. Fresh lemon juice is significantly better than bottled.
- 1 teaspoon vanilla extract: Enhances the flavor profile with aromatic warmth. Pure vanilla extract rather than imitation makes a noticeable difference.
- 1/4 cup unsweetened almond milk: Adjusts the consistency for perfect creaminess. Any milk (dairy or plant-based) can be substituted.
For Topping (Optional):
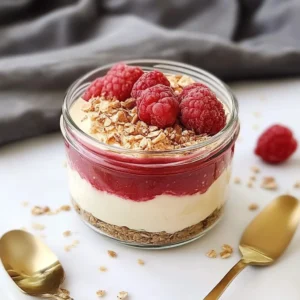
- 1 cup fresh berries: Adds color, flavor, and antioxidants. Choose seasonal options for the freshest flavor.
- 2 tablespoons crushed nuts: Provides textural contrast and healthy fats. Toasted nuts offer enhanced flavor.
- 1 tablespoon chia seeds: Adds omega-3 fatty acids and pleasant texture. Pre-soaked chia seeds work best for immediate serving.
- Mint leaves: For a fresh, aromatic garnish that brightens the overall flavor profile.
How to Make No Bake Protein Cheesecake Jar
Step 1: Prepare the Crust
- In a medium bowl, combine almond flour, melted coconut oil, honey or maple syrup, cinnamon, and salt. Mix thoroughly until the mixture resembles wet sand and holds together when pressed between your fingers.
- Divide the mixture evenly among four 8-oz mason jars or dessert glasses, adding about 2 tablespoons to each jar.
- Using the back of a spoon or a small cup with a flat bottom, press the mixture firmly into the bottom of each jar to create a compact, even layer. The more firmly you press, the better the crust will hold together.
- Place the jars in the refrigerator to chill while you prepare the filling. This will help the coconut oil solidify, creating a firmer base.
Step 2: Create the Protein Cheesecake Filling
- In a large mixing bowl, place the softened cream cheese. Using an electric mixer or a whisk, beat the cream cheese until smooth and fluffy, about 1-2 minutes. Ensuring the cream cheese is at room temperature is crucial for a lump-free filling.
- Add the Greek yogurt and beat until well combined and creamy.
- In a separate small bowl, whisk together the protein powder and almond milk until smooth, eliminating any lumps. This pre-mixing prevents protein powder clumps in your final product.
- Add the protein mixture to the cream cheese mixture, along with honey, lemon juice, and vanilla extract.
- Beat on medium speed until everything is well incorporated and the mixture is smooth and creamy, about 2-3 minutes. The texture should be similar to a thick pudding – easily spoonable but holding its shape.
- Taste and adjust sweetness if needed, remembering that the filling will taste slightly less sweet once chilled.
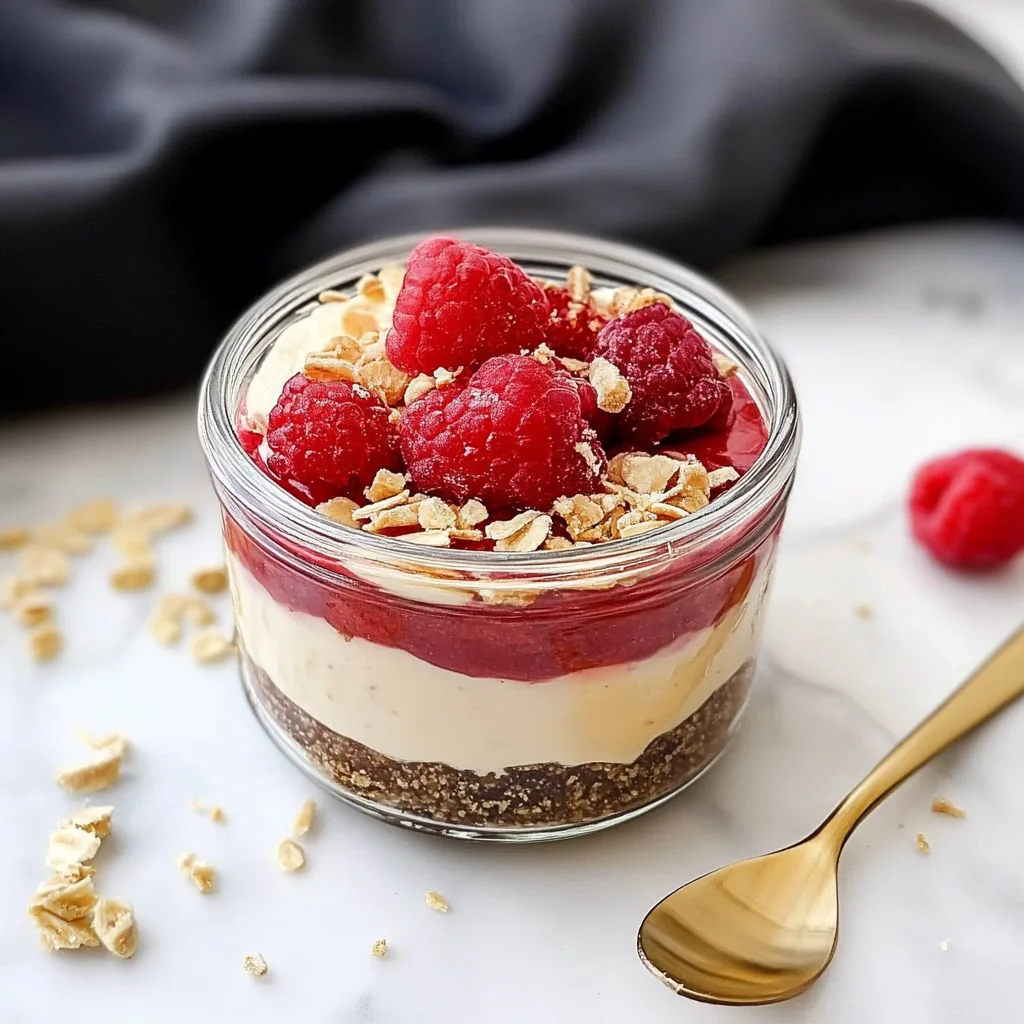
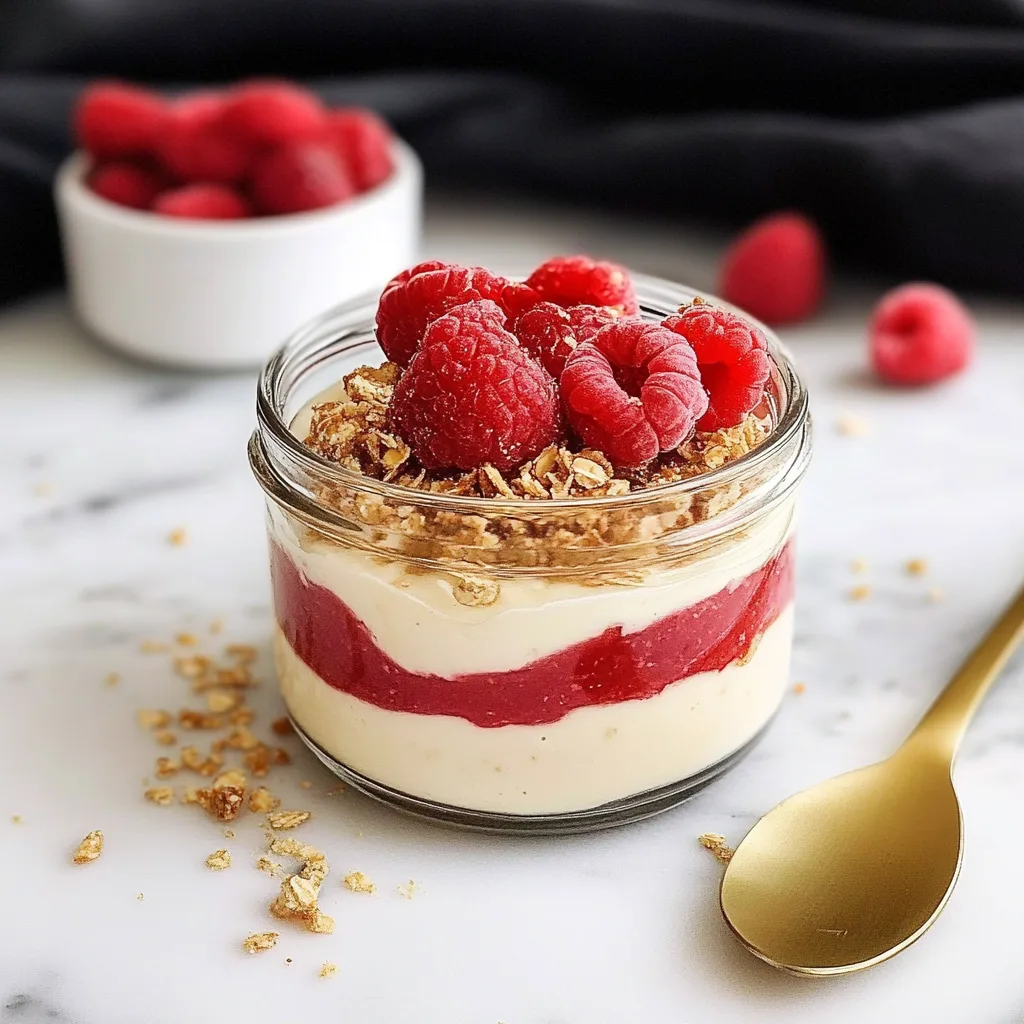
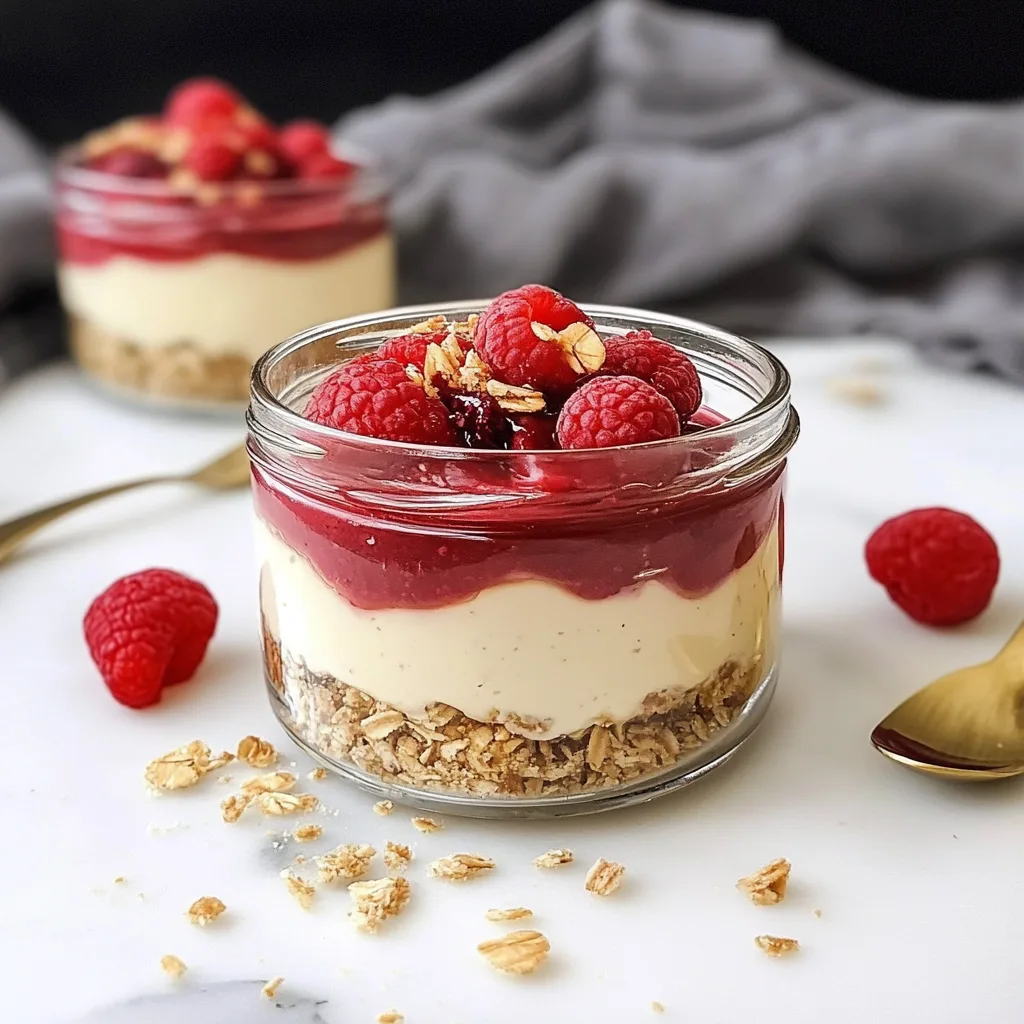
Step 3: Assemble Your No Bake Protein Cheesecake Jars
- Remove the jars with the prepared crusts from the refrigerator.
- Carefully spoon or pipe the cheesecake filling over the crust in each jar, dividing it evenly. Fill to about 3/4 of the jar to leave room for toppings.
- Smooth the tops with the back of a spoon or gently tap the jars on the counter to settle the filling.
- Cover each jar with a lid or plastic wrap and refrigerate for at least 2 hours, or ideally overnight. The filling will firm up as it chills, creating that perfect cheesecake texture.
Step 4: Add Toppings and Serve
- Just before serving, remove the jars from the refrigerator and add your chosen toppings.
- For berry toppings, arrange fresh berries on top of the filling. For a more sauce-like topping, lightly mash some berries with a fork and spoon over the filling.
- Sprinkle with crushed nuts and chia seeds if desired, and garnish with a small mint leaf.
- Allow the jars to sit at room temperature for about 5-10 minutes before serving for the best flavor and texture experience.
Delicious Variations of No Bake Protein Cheesecake Jar
Chocolate Lover’s Dream
Replace vanilla protein powder with chocolate protein powder and add 1 tablespoon of unsweetened cocoa powder to the filling. Top with dark chocolate shavings and fresh raspberries for a decadent treat that’s still packed with protein.
Tropical Paradise
Add 2 tablespoons of unsweetened shredded coconut to the crust mixture and fold in 1/4 cup of finely diced mango to the filling. Top with fresh pineapple chunks and toasted coconut flakes for a vacation-in-a-jar experience.
Peanut Butter Bliss
Stir 2 tablespoons of natural peanut butter into the filling and use a chocolate protein powder. Create a crust from crushed chocolate protein cookies instead of almond flour. Top with a small drizzle of peanut butter and a few dark chocolate chips for an indulgent yet protein-rich dessert.
Pumpkin Spice Sensation
Perfect for fall, add 1/4 cup of pumpkin puree and 1 teaspoon of pumpkin pie spice to the filling. Replace the almond flour with crushed gingersnap cookies for the crust. Top with a sprinkle of cinnamon and chopped pecans for a seasonal favorite.
Berry Cheesecake Swirl
After preparing the basic filling, set aside about 1/4 cup. Blend 1/4 cup of fresh berries (strawberries, blueberries, or raspberries) and fold into the reserved filling. Layer both the plain and berry fillings in the jar for a beautiful swirl effect and top with fresh berries.
Lemon Blueberry Delight
Add an extra tablespoon of lemon juice and 1 tablespoon of lemon zest to the filling. Layer fresh blueberries between the crust and filling, and add more blueberries on top. The bright citrus notes perfectly complement the sweet blueberries and tangy cheesecake.
No Bake Protein Cheesecake Jar
Equipment
- Medium mixing bowl
Ingredients
For the Crust Base
- 1 cup almond flour
- 2 tbsp coconut oil melted
- 1 tbsp honey or maple syrup
- 1/4 tsp cinnamon
- Pinch of salt
For the Protein Cheesecake Filling
- 8 oz cream cheese softened
- 1/4 cup Greek yogurt
- 2 scoops approx. 60g vanilla protein powder
- 3 tbsp honey or maple syrup
- 1 tbsp lemon juice
- 1 tsp vanilla extract
- 1/4 cup unsweetened almond milk
For Topping (Optional)
- 1 cup fresh berries
- 2 tbsp crushed nuts
- 1 tbsp chia seeds
- Mint leaves
Instructions
Step 1: Prepare the Crust
- Combine almond flour, melted coconut oil, honey/maple syrup, cinnamon, and salt in a bowl.
- Mix until it resembles wet sand.
- Divide evenly into 4 jars and press down firmly to form the crust.
- Chill in the fridge while making the filling.
Step 2: Make the Protein Cheesecake Filling
- Beat softened cream cheese until smooth.
- Add Greek yogurt and mix well.
- Whisk protein powder with almond milk separately to remove lumps, then add to the mixture.
- Stir in honey, lemon juice, and vanilla extract.
- Mix until creamy and well combined.
Step 3: Assemble the Cheesecake Jars
- Spoon or pipe the filling over the crusts.
- Smooth the tops and refrigerate for at least 2 hours.
Step 4: Add Toppings & Serve
- Before serving, top with fresh berries, crushed nuts, chia seeds, or mint leaves.
- Let jars sit at room temperature for 5-10 minutes for the best texture.
Notes
- Make it vegan: Use dairy-free cream cheese, coconut yogurt, and plant-based protein powder.
- Adjust sweetness: Depending on your protein powder, you may need more or less sweetener.
- Make ahead: Store in the fridge for up to 3 days, covered.
Nutrition
Frequently Asked Questions About No Bake Protein Cheesecake Jar
How long do these No Bake Protein Cheesecake Jars last in the refrigerator?
These jars will keep well in the refrigerator for up to 5 days when stored properly with lids sealed tightly. I recommend adding fresh fruit toppings just before serving for the best appearance and texture. The cheesecake filling itself may develop a firmer texture over time, so allowing it to sit at room temperature for 5-10 minutes before eating after refrigeration will yield the best texture.
Can I make these No Bake Protein Cheesecake Jars dairy-free?
Absolutely! Substitute the cream cheese with dairy-free cream cheese alternatives (cashew or coconut-based work well) and use coconut or almond milk yogurt instead of Greek yogurt. Ensure your protein powder is also dairy-free, and you’ll have a completely plant-based version that’s still delicious and protein-rich.
My protein cheesecake filling turned out lumpy. What went wrong?
Lumpy filling usually results from cream cheese that’s too cold. Always allow your cream cheese to come to room temperature (about 30-60 minutes on the counter) before mixing. Another tip is to pre-mix your protein powder with liquid before adding it to the cream cheese to ensure it dissolves completely.
Can I freeze these No Bake Protein Cheesecake Jars?
Yes! These jars freeze surprisingly well for up to 2 months. Freeze them without toppings and thaw overnight in the refrigerator before serving. The texture might be slightly different after freezing, but still delicious. Add fresh toppings after thawing for the best presentation.
What type of protein powder works best in this recipe?
I’ve found that whey protein isolate creates the smoothest texture, but any good quality protein powder will work. If using plant-based proteins (like pea, hemp, or brown rice), you might need to adjust the liquid slightly as they tend to absorb more moisture. Always choose a protein powder with a flavor you enjoy, as it will significantly impact the final taste.
Can I make this recipe without protein powder?
Yes, you can substitute the protein powder with 1/4 cup of powdered sugar or confectioner’s sugar and 2 tablespoons of milk powder for a similar texture. This will create a traditional no-bake cheesecake, although it will lack the protein boost. For a more nutritious alternative without protein powder, try using collagen peptides, which dissolve easily and don’t affect the flavor.
In Closing
As I watch friends and family enjoy these No Bake Protein Cheesecake Jars, I’m always reminded of my grandmother’s famous cheesecake that would take center stage at every family gathering. She was initially skeptical of my “healthified” version, convinced that true desserts required copious amounts of sugar and full-fat everything. But after one taste, she not only approved but asked for the recipe to share with her bridge club – a testament to how these little jars honor traditional flavors while embracing modern nutritional awareness.
What makes these No Bake Protein Cheesecake Jars truly special isn’t just their nutritional profile or convenience – it’s their ability to bring people together. There’s something deeply satisfying about creating a dessert that everyone can enjoy, regardless of dietary preferences or fitness goals. The beauty of this recipe lies in its adaptability – make it your own by experimenting with different flavors, toppings, and presentations.
Whether you’re enjoying these jars as a post-workout reward, a meal-prepped weekday treat, or serving them at a gathering, they represent the perfect balance between nourishment and indulgence. In a world where we often feel we must choose between eating for pleasure and eating for wellness, these No Bake Protein Cheesecake Jars remind us that with a little creativity, we can have both. So go ahead, take that first creamy spoonful, and savor the moment – you’ve found a dessert that loves you back.