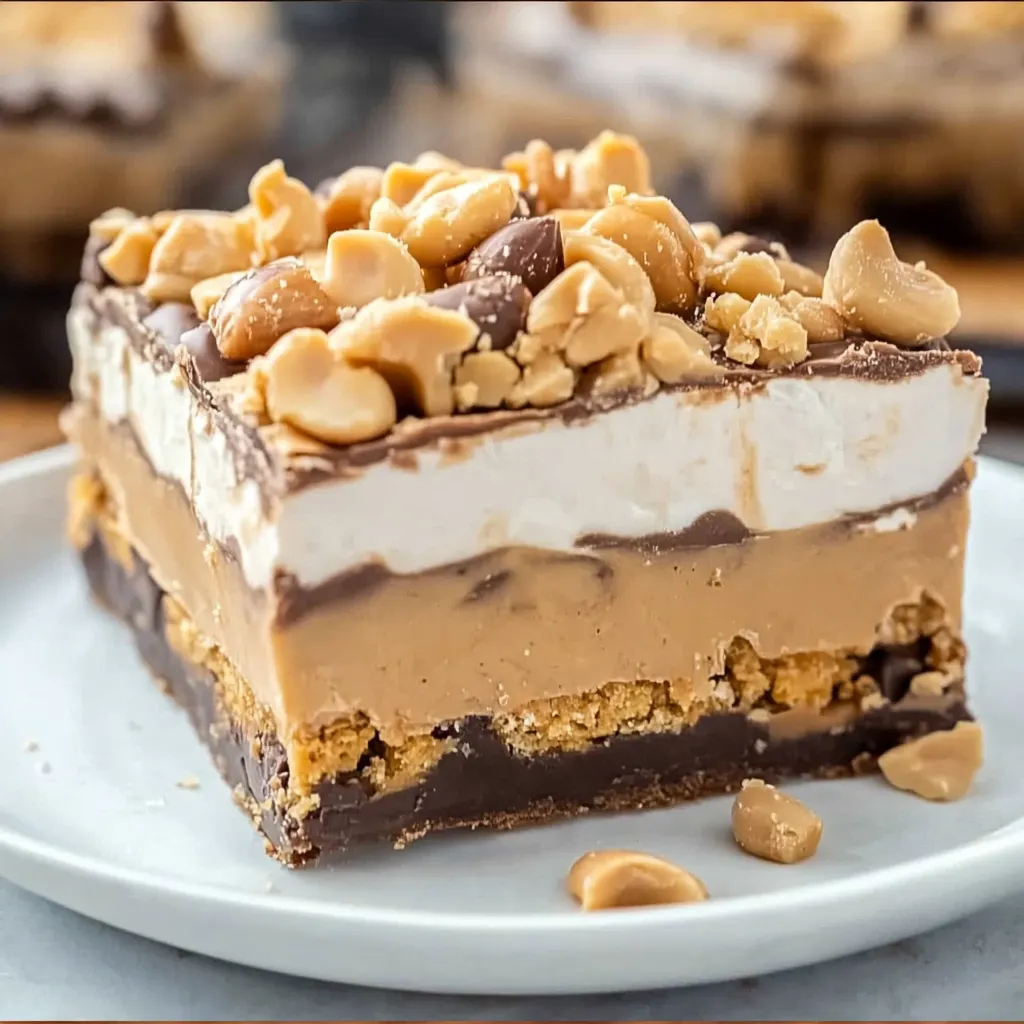
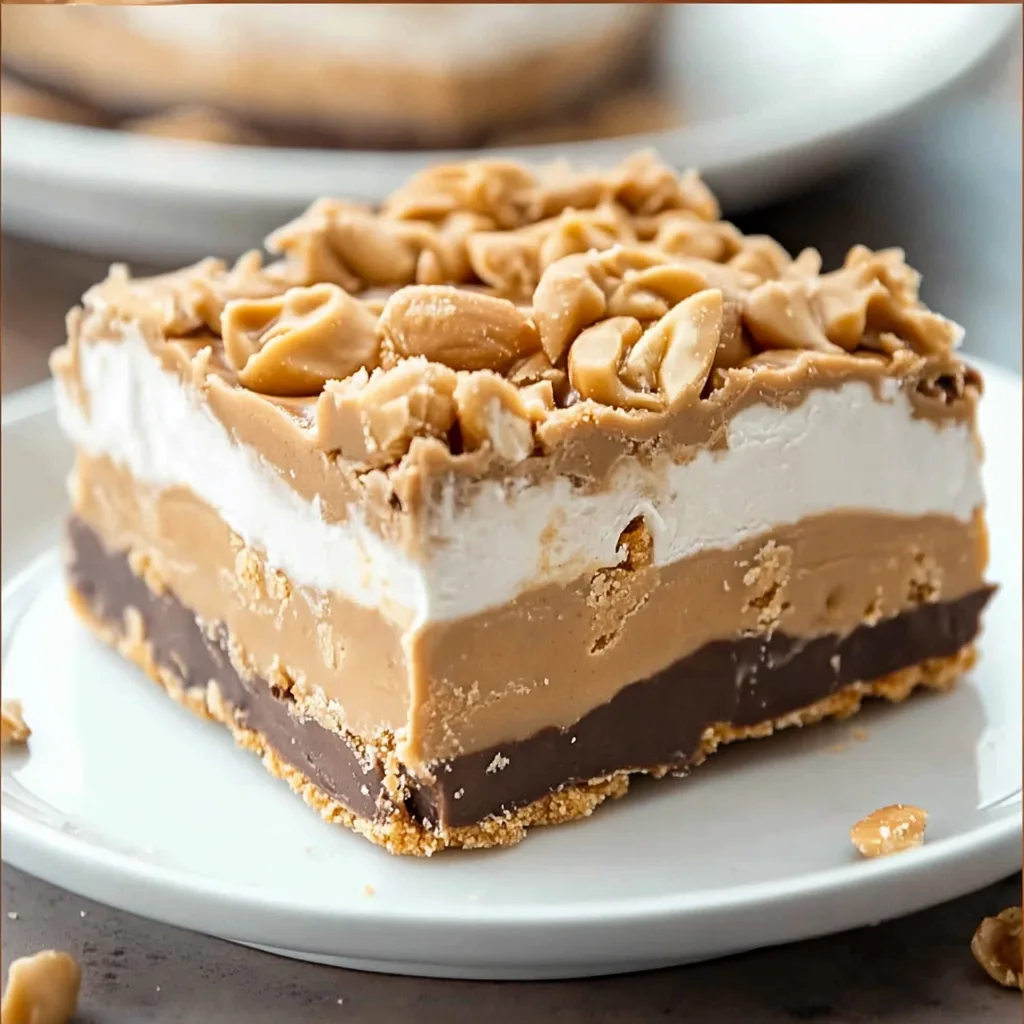
There’s something almost magical about the perfect Peanut Butter Dream Bars that makes them impossible to resist. I’ve spent years perfecting this recipe, and I’m thrilled to finally share my secret version that consistently disappears within minutes at every gathering. These Peanut Butter Dream Bars feature a perfect harmony of textures—a buttery, crisp base that supports layers of velvety peanut butter filling and rich chocolate ganache. Each bite delivers an intensely satisfying mouthful where sweet meets salty in perfect balance, with the distinctive aroma of roasted peanuts mingling with chocolate to create a nostalgic yet sophisticated treat. Keep reading to discover how these simple ingredients transform into dessert bars so delicious they’ve earned their “dream” status for very good reason.
Why You’ll Love These Peanut Butter Dream Bars

If you’ve ever struggled with complicated dessert recipes that require precise baking temperatures or perfect timing, these Peanut Butter Dream Bars will be your new best friend. The no-bake format eliminates common baking frustrations while delivering a dessert that tastes like it came from a professional bakery.
I first created these Peanut Butter Dream Bars when I needed a make-ahead dessert for a summer party during a heatwave when turning on the oven wasn’t an option. To my surprise, they became the most requested item at every subsequent gathering. My brother-in-law, who normally politely declines dessert, asked for the recipe after his third bar—a true testament to their irresistible quality.
What makes these bars particularly wonderful is how easily they can be customized to suit different tastes and dietary needs. The basic structure remains the same, but you can adjust sweetness levels, incorporate different mix-ins, or even adapt them for various dietary restrictions without compromising that dreamlike quality.
Now let’s dive into exactly what you’ll need to create these crowd-pleasing Peanut Butter Dream Bars in your own kitchen.
Ingredients for Perfect Peanut Butter Dream Bars
For the Crust
- 2 cups graham cracker crumbs – These provide the perfect crisp, slightly sweet foundation. For the best texture, use name-brand graham crackers, which tend to have a more consistent crumb. You can substitute digestive biscuits or gluten-free graham crackers if needed.
- 1/2 cup unsalted butter, melted – Butter binds the crust and adds rich flavor. European-style butter with higher fat content creates an exceptionally rich base. For a dairy-free option, coconut oil works well but will add a slight coconut flavor.
- 1/4 cup granulated sugar – This adds sweetness and helps bind the crust. You can reduce to 2 tablespoons if you prefer a less sweet base, or substitute coconut sugar for a deeper caramel note.
- 1/2 teaspoon salt – Critical for enhancing the sweet-savory balance that makes Peanut Butter Dream Bars so addictive. Use flaky sea salt for subtle texture variation.
For the Peanut Butter Layer
- 1 cup creamy peanut butter – The star ingredient! Use a high-quality brand that’s emulsified and not too oily. Natural peanut butter can work but may create a softer texture that’s harder to slice neatly. Almond butter is a good substitute for those with peanut allergies.
- 1 cup powdered sugar – This sweetens while maintaining the smooth texture. Sift it first to ensure there are no lumps in your dreamy filling.
- 1/2 cup unsalted butter, softened – Adds richness and creates the perfect creamy consistency. Must be at room temperature for proper incorporation.
- 1 teaspoon vanilla extract – Enhances the peanut flavor. Use pure extract rather than imitation for the best flavor profile.
- 1/4 teaspoon salt – Balances sweetness and amplifies the peanut butter flavor.
For the Chocolate Topping
- 1 1/2 cups semi-sweet chocolate chips – Creates the perfect chocolate layer that complements the peanut butter. You can substitute dark chocolate (60-70% cacao) for a less sweet, more sophisticated flavor profile.
- 1/4 cup heavy cream – Creates a ganache-like consistency that sets firmly but slices cleanly. For dairy-free versions, full-fat coconut milk works wonderfully.
- 2 tablespoons unsalted butter – Adds shine and improves the mouthfeel of the chocolate layer. Helps prevent the chocolate from cracking when sliced.
- 1/4 teaspoon espresso powder (optional) – Not traditional, but this secret ingredient intensifies the chocolate flavor without adding coffee taste.
Optional Garnishes
- 1/3 cup chopped roasted peanuts – Adds textural contrast and visual appeal.
- Flaky sea salt – A light sprinkle enhances all flavors and adds gourmet appeal.
- 2 tablespoons peanut butter chips – Can be melted and drizzled over the top for decoration.
How to Make Peanut Butter Dream Bars

Step 1: Prepare the Pan and Crust
- Line a 9×9 inch baking pan with parchment paper, leaving overhang on two sides for easy removal. This is essential for achieving clean-cut Peanut Butter Dream Bars.
- In a medium bowl, combine graham cracker crumbs, melted butter, sugar, and salt. Mix until the mixture resembles wet sand and holds together when pressed.
- Press the mixture firmly into the bottom of the prepared pan, creating an even layer. Use the bottom of a measuring cup to compact it—this prevents a crumbly crust.
- Refrigerate the crust for 20 minutes to set while preparing the next layer. You’ll know it’s ready when it feels firm to the touch.
Step 2: Create the Peanut Butter Layer
- In a large bowl, beat softened butter and peanut butter until completely smooth and fluffy, about 2 minutes. The mixture should be lighter in color and texture.
- Gradually add powdered sugar, mixing on low speed to prevent a sugar cloud, then increase to medium speed until fully incorporated.
- Add vanilla extract and salt, beating until the mixture is completely smooth. At this point, the filling should be thick but spreadable, similar to frosting consistency.
- Spread the peanut butter mixture evenly over the chilled crust using an offset spatula. Create a smooth, level surface by holding the spatula at a slight angle while spreading.
- Refrigerate for 30 minutes until the layer is firm enough that your finger doesn’t leave an impression when lightly touched.
Step 3: Make the Chocolate Topping
- Place chocolate chips in a heat-safe bowl.
- In a small saucepan, heat heavy cream and butter until just below simmering—you’ll see small bubbles forming around the edges of the pan.
- Pour the hot cream mixture over the chocolate chips. Add espresso powder if using. Let stand untouched for 2 minutes to allow the chocolate to soften.
- Whisk the mixture starting from the center and working outward until completely smooth and glossy. If any unmelted chocolate remains, microwave in 10-second intervals, stirring between each.
- Pour the chocolate mixture over the chilled peanut butter layer, tilting the pan gently to create an even coating. Tap the pan lightly on the counter to remove air bubbles.
- If using garnishes, sprinkle them on now while the chocolate is still soft.
Step 4: Chill and Slice
- Refrigerate the Peanut Butter Dream Bars for at least 4 hours, preferably overnight. The bars need this time to set properly for clean cutting.
- When ready to serve, use the parchment paper overhang to lift the entire dessert out of the pan.
- Warm a sharp knife under hot water, wipe dry, and slice into bars. Clean and rewarm the knife between cuts for the cleanest edges.
- For the best flavor and texture, allow the bars to stand at room temperature for 10-15 minutes before serving. This softens the chocolate slightly and brings out the full flavor of the peanut butter.
Delicious Variations of Peanut Butter Dream Bars
1. Salted Caramel Peanut Butter Dream Bars
Add a layer of thick salted caramel sauce (about 1/2 cup) between the peanut butter and chocolate layers. The caramel introduces a buttery sweetness that complements both the peanut butter and chocolate while adding another textural dimension.
2. Pretzel Crunch Peanut Butter Dream Bars
Replace half the graham cracker crumbs with finely crushed pretzels in the base. The pretzel’s saltiness and unique texture create an addictive contrast to the creamy peanut butter layer, making these bars even more irresistible.
3. Peanut Butter and Jelly Dream Bars
Spread a thin layer (about 1/3 cup) of good quality strawberry or grape jam on top of the crust before adding the peanut butter layer. This nostalgic combination turns the bars into a sophisticated version of a childhood favorite.
4. Banana Peanut Butter Dream Bars
Mix 1/2 cup of banana puree (about 1 medium very ripe banana) into the peanut butter filling and add 1/4 teaspoon of cinnamon. This creates a subtle tropical flavor that pairs beautifully with both the peanut butter and chocolate elements.
5. Chocolate Cookie Peanut Butter Dream Bars
Substitute chocolate sandwich cookies (like Oreos) for the graham crackers in the crust. This creates a dramatic black base that provides chocolatey contrast in every bite and intensifies the classic chocolate-peanut butter pairing.
6. Spiced Maple Peanut Butter Dream Bars
Replace the granulated sugar with pure maple syrup in the crust and add 2 tablespoons of maple syrup plus 1/4 teaspoon cinnamon and a pinch of nutmeg to the peanut butter filling. Perfect for fall gatherings, these bars have a warm, comforting flavor profile that’s especially appealing during cooler months.

PEANUT BUTTER DREAM BARS
Equipment
- Mixing bowls
Ingredients
For the Crust:
- 2 cups graham cracker crumbs
- 1/2 cup unsalted butter melted
- 1/4 cup granulated sugar
- 1/2 teaspoon salt
For the Peanut Butter Layer:
- 1 cup creamy peanut butter
- 1 cup powdered sugar sifted
- 1/2 cup unsalted butter softened
- 1 teaspoon vanilla extract
- 1/4 teaspoon salt
For the Chocolate Topping:
- 1 1/2 cups semi-sweet chocolate chips
- 1/4 cup heavy cream
- 2 tablespoons unsalted butter
- 1/4 teaspoon espresso powder optional
Optional Garnishes:
- 1/3 cup chopped roasted peanuts
- Flaky sea salt
- 2 tablespoons peanut butter chips for drizzle
Instructions
Step 1: Prepare the Pan & Crust
- Line a 9×9 inch baking pan with parchment paper, leaving overhang for easy removal.
- Mix graham cracker crumbs, melted butter, sugar, and salt in a bowl until it resembles wet sand.
- Press the mixture firmly into the pan. Chill for 20 minutes.
Step 2: Make the Peanut Butter Layer
- Beat softened butter and peanut butter until smooth.
- Gradually mix in powdered sugar, then add vanilla and salt.
- Spread the mixture over the crust evenly. Chill for 30 minutes.
Step 3: Prepare the Chocolate Topping
- Heat heavy cream and butter until just below simmering.
- Pour over chocolate chips, let sit for 2 minutes, then stir until smooth.
- Pour over the peanut butter layer, spreading evenly.
Step 4: Chill & Slice
- Refrigerate for at least 4 hours (or overnight).
- Use parchment overhang to lift out of the pan, then slice into bars with a warm knife.
- Let bars sit at room temperature for 10-15 minutes before serving.
Notes
🔹 Pretzel Crunch Version: Replace half the graham cracker crumbs with crushed pretzels.
🔹 PB&J Version: Spread 1/3 cup of jam on the crust before the peanut butter layer.
🔹 Dairy-Free Version: Use coconut oil instead of butter and full-fat coconut milk instead of heavy cream.
🔹 Gluten-Free Version: Use gluten-free graham crackers.
Nutrition
Frequently Asked Questions About Peanut Butter Dream Bars
How should I store Peanut Butter Dream Bars?
Store these bars in an airtight container in the refrigerator for up to one week. Place parchment paper between layers if stacking to prevent sticking. For longer storage, these bars freeze beautifully for up to three months. Wrap individual portions in plastic wrap, then store in a freezer-safe container. Thaw in the refrigerator overnight before serving.
Can I make Peanut Butter Dream Bars in advance for a party?
Absolutely! These bars are perfect for make-ahead desserts. In fact, they benefit from an overnight chill, which allows the flavors to meld and the textures to set perfectly. I often make them 1-2 days before an event, which not only ensures they’ll be properly set but also frees up time on the day of the gathering.
Why are my Peanut Butter Dream Bars too soft to cut neatly?
If your bars are too soft, they likely haven’t chilled long enough or your room is too warm. Ensure they chill for a minimum of 4 hours, preferably overnight. For extra-clean cuts, place the bars in the freezer for 15 minutes before slicing. Also, make sure you’re using conventional peanut butter rather than natural varieties, which can create a softer consistency due to their higher oil content.
Can I make these Peanut Butter Dream Bars gluten-free?
Yes! Simply substitute gluten-free graham crackers or cookies for the crust. Ensure all other ingredients, especially the peanut butter, are certified gluten-free, as some commercial brands may contain additives with gluten. The rest of the recipe remains exactly the same, and the result is equally delicious.
How can I make Peanut Butter Dream Bars less sweet?
To reduce sweetness while maintaining structure, reduce the powdered sugar in the peanut butter layer to 2/3 cup and use dark chocolate (70% cacao or higher) for the topping. You can also reduce the sugar in the crust to 2 tablespoons. Adding a bit more salt (an additional 1/4 teaspoon in the peanut butter layer) will help balance the sweetness while enhancing the peanut flavor.
My chocolate layer cracked when I cut the bars. How can I prevent this?
Cracking usually occurs when the chocolate layer is too cold or the ratio of chocolate to cream isn’t right. Make sure you’re using the full 1/4 cup of heavy cream and 2 tablespoons of butter in the chocolate layer. Allow the bars to sit at room temperature for 15-20 minutes before cutting, and use a knife warmed under hot water (then dried) for each cut. The added butter in the chocolate layer also helps prevent cracking by keeping the ganache slightly softer.
A Sweet Legacy of Shared Joy
Every time I make these Peanut Butter Dream Bars, I’m reminded of the first summer I brought them to my family’s annual reunion. My great-aunt Ellie—who had been the family’s dessert queen for decades—took one bite and quietly asked for the recipe, a moment of culinary torch-passing I’ll never forget. What started as my simple adaptation of a classic treat has become a treasured part of our family gatherings, with each relative now adding their own special touch.
What I love most about Peanut Butter Dream Bars is how they bridge generations—they’re sophisticated enough for the adults but familiar and comforting enough for the children. They connect us to nostalgic flavors while offering endless possibilities for personalization and creativity.
I encourage you to make these Peanut Butter Dream Bars your own. Perhaps you’ll add a special spice, incorporate a family-favorite ingredient, or create a new tradition around when you serve them. Whatever your variation, the moment of pure joy that comes from that first creamy, rich bite remains the same—a small but perfect culinary dream that brings people together, one delicious square at a time.

