

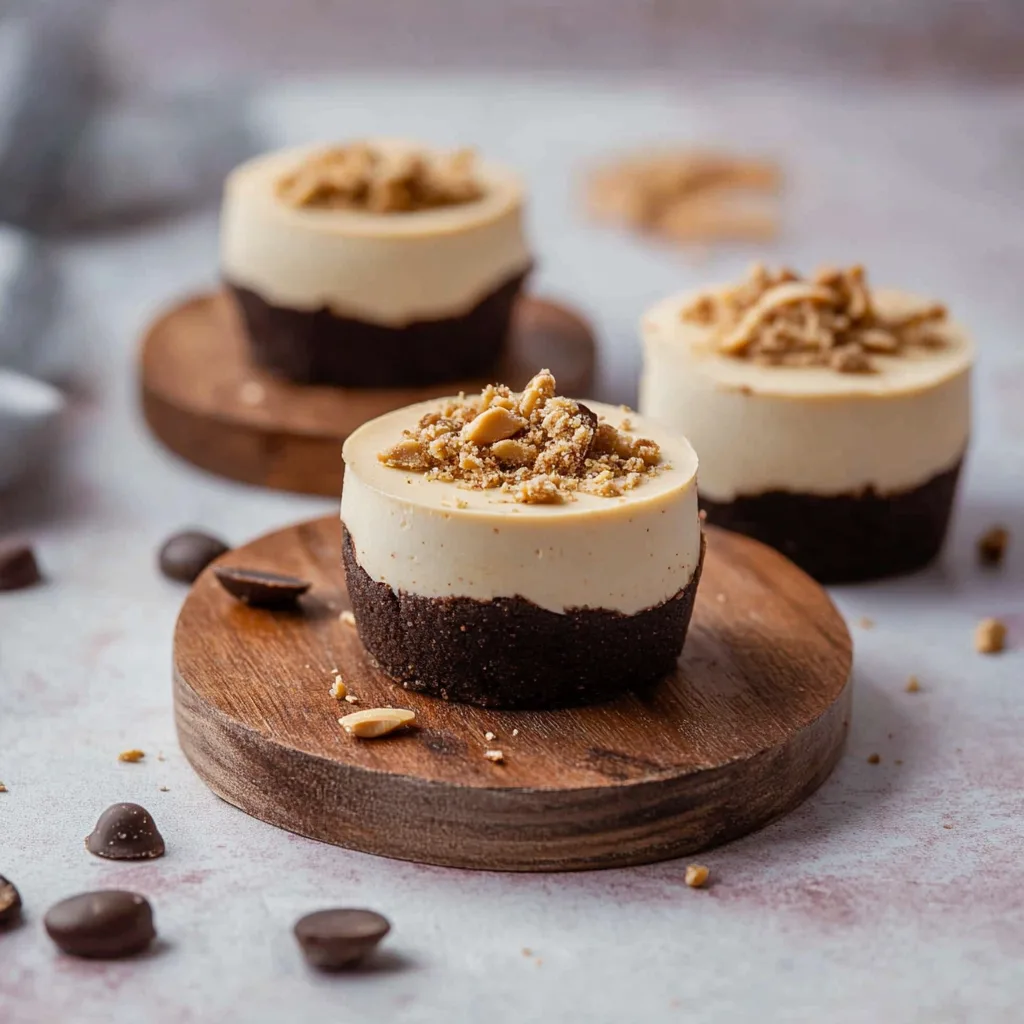
The first time I sank my spoon into one of these protein peanut butter cheesecake cups, I knew I’d created something special. The silky-smooth texture combined with that irresistible peanut butter flavor delivers pure indulgence, yet these delightful treats pack a protein punch that keeps you satisfied long after the last bite. What makes these protein peanut butter cheesecake cups truly remarkable is their perfect balance – decadent enough to feel like dessert, nutritious enough to enjoy guilt-free. The contrast between the crunchy graham cracker base and the velvety cheesecake filling creates a sensory experience that’s utterly addictive, while the subtle hints of vanilla and honey round out the flavor profile in the most delightful way.
Stay with me to discover how these protein peanut butter cheesecake cups can transform your approach to healthy desserts – and why they’ve become my most requested recipe for everything from post-workout snacks to elegant dinner parties.
Why You’ll Love This Recipe
If you’ve ever struggled to find desserts that satisfy your sweet tooth without derailing your fitness goals, these protein peanut butter cheesecake cups are about to become your new best friend. The beauty of this recipe lies in its solution to that age-old dilemma: how to enjoy something truly delicious that also supports your nutrition goals.
I first developed these protein peanut butter cheesecake cups during my training for a half-marathon. I needed something that would satisfy my persistent sweet cravings but also help with muscle recovery. When I brought these to a family gathering, my cousin – who typically avoids anything labeled “healthy” – devoured three in one sitting and demanded the recipe. That’s when I knew I had stumbled onto something special.
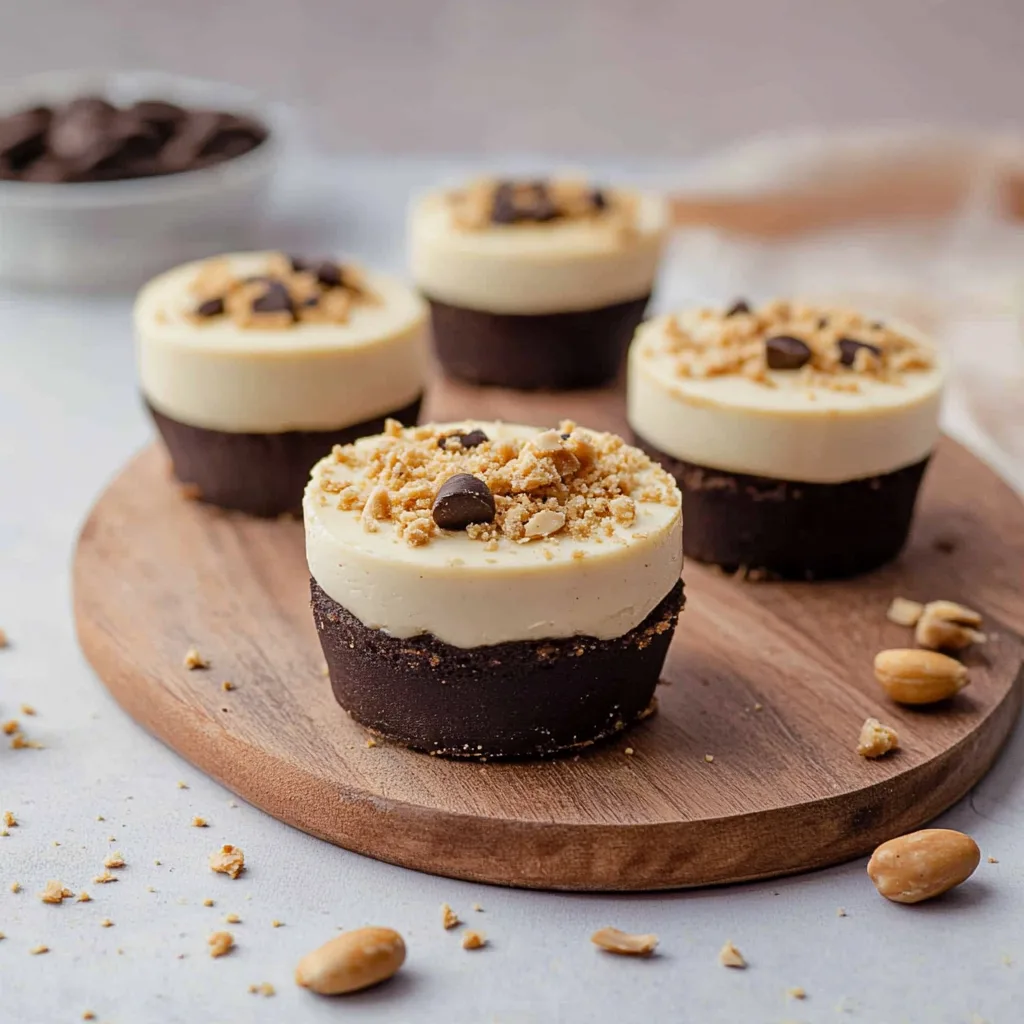
What makes these protein peanut butter cheesecake cups so versatile is how easily they can be customized. Whether you prefer a chocolate crust, alternative nut butters, or seasonal fruit toppings, the basic formula adapts beautifully to your preferences. They’re perfect for meal prep since they store well in the refrigerator or freezer, and they’re individually portioned for easy grabbing when cravings strike.
Now, let’s dive into exactly what you’ll need to create these perfect little treats that balance indulgence with nutrition.
Ingredients
For the Crust:
- 1 cup graham cracker crumbs (about 8 full sheets) – These provide the perfect crunchy foundation and that classic cheesecake flavor. For a gluten-free option, use gluten-free graham crackers or almond flour with a touch of cinnamon.
- 3 tablespoons melted coconut oil – This binds the crust together and adds a subtle hint of sweetness. You can substitute with melted butter if preferred, though coconut oil provides a lighter texture.
- 1 tablespoon honey or maple syrup – This adds just enough sweetness to balance the crust. Choose raw honey for additional nutritional benefits or maple syrup for a vegan option.
- 1 scoop (about 30g) vanilla protein powder – This transforms the crust into a protein-rich base. Choose a high-quality protein that blends well and has a flavor you enjoy. Whey, plant-based, or collagen proteins all work nicely here.
For the Protein Peanut Butter Cheesecake Filling:
- 8 oz reduced-fat cream cheese, softened – This creates the classic cheesecake texture but with fewer calories. Ensure it’s fully softened for a smooth consistency. For a dairy-free option, use a high-quality vegan cream cheese alternative.
- ½ cup natural peanut butter – The star ingredient that gives these protein peanut butter cheesecake cups their distinctive flavor. Look for varieties with just peanuts and salt for the cleanest flavor profile. Almond or cashew butter can be substituted for those with peanut allergies.
- ¼ cup Greek yogurt – This adds creaminess and protein while reducing the overall fat content. Use full-fat Greek yogurt for the richest texture, or a dairy-free yogurt alternative if needed.
- 2 scoops (about 60g) vanilla protein powder – This boosts the protein content significantly. Choose a high-quality protein that blends well without grittiness. Whey isolate creates the smoothest texture, but plant-based proteins work well for vegan options.
- 3 tablespoons honey or maple syrup – This provides natural sweetness without refined sugar. Adjust to taste depending on how sweet your protein powder is.
- 1 teaspoon vanilla extract – This enhances the flavor of all other ingredients. Use pure vanilla extract rather than imitation for the best flavor.
- ¼ teaspoon salt – This balances the sweetness and enhances the peanut butter flavor. Sea salt or pink Himalayan salt add subtle mineral notes.
For the Optional Topping:
- ¼ cup melted dark chocolate – This adds a decadent finish. Choose 70% or higher cocoa content for antioxidant benefits.
- 2 tablespoons chopped peanuts – These add a satisfying crunch and visual appeal. Toast them lightly for enhanced flavor.
- Fresh berries – These provide a beautiful color contrast and fresh flavor that balances the richness. Raspberries pair particularly well with the peanut butter.
How to Make Protein Peanut Butter Cheesecake Cups
Step 1: Prepare Your Workspace and Tools
- Line a 12-cup muffin tin with paper liners. Silicone liners work exceptionally well as they release easily and can be reused.
- Ensure all refrigerated ingredients are at room temperature, particularly the cream cheese. This is crucial for a smooth, lump-free filling.
- Have all measuring tools and ingredients ready before starting. This no-bake recipe moves quickly, and preparation makes the process seamless.
Pro tip: If you’re short on time, unwrap your cream cheese and microwave it in 10-second intervals until just softened, not melted.
Step 2: Create the Protein-Enhanced Crust
- In a medium bowl, combine graham cracker crumbs, melted coconut oil, honey, and protein powder. Mix until the consistency resembles wet sand that holds together when pressed.
- Divide the mixture evenly among the prepared muffin cups (about 1 tablespoon per cup).
- Using the back of a tablespoon or a small glass with a flat bottom, press the mixture firmly into the bottom of each cup to create a compact, even layer.
- Place the tray in the refrigerator to chill while preparing the filling.
Visual cue: The crust should look uniform and feel firm to the touch, not crumbly or loose.
Step 3: Prepare the Protein Peanut Butter Cheesecake Filling
- In a large mixing bowl, beat the softened cream cheese with an electric mixer until completely smooth and fluffy, about 2 minutes. Scrape down the sides of the bowl frequently to ensure no lumps remain.
- Add the peanut butter and beat until fully incorporated and smooth.
- Add the Greek yogurt, protein powder, honey, vanilla extract, and salt. Beat on low speed initially to avoid a protein powder cloud, then increase to medium speed until the mixture is completely smooth and uniform.
- Taste and adjust sweetness if needed, keeping in mind that the filling should be slightly sweeter than you want the final product to be, as it will taste less sweet when chilled.
Visual cue: The filling should be thick but easily spreadable, similar to a fluffy frosting consistency. If it’s too thick, add a tablespoon of milk or almond milk to thin it slightly.
Step 4: Assemble and Chill
- Remove the muffin tin with the prepared crusts from the refrigerator.
- Using a cookie scoop or spoon, divide the protein peanut butter cheesecake filling evenly among the crusts, filling each cup almost to the top.
- Smooth the tops with the back of a spoon or an offset spatula dipped in hot water.
- Cover the muffin tin loosely with plastic wrap and refrigerate for at least 4 hours, preferably overnight. This chilling time is crucial for the flavors to meld and the texture to set properly.
Pro tip: For a quicker set, place the muffin tin in the freezer for 1-2 hours instead of the refrigerator.
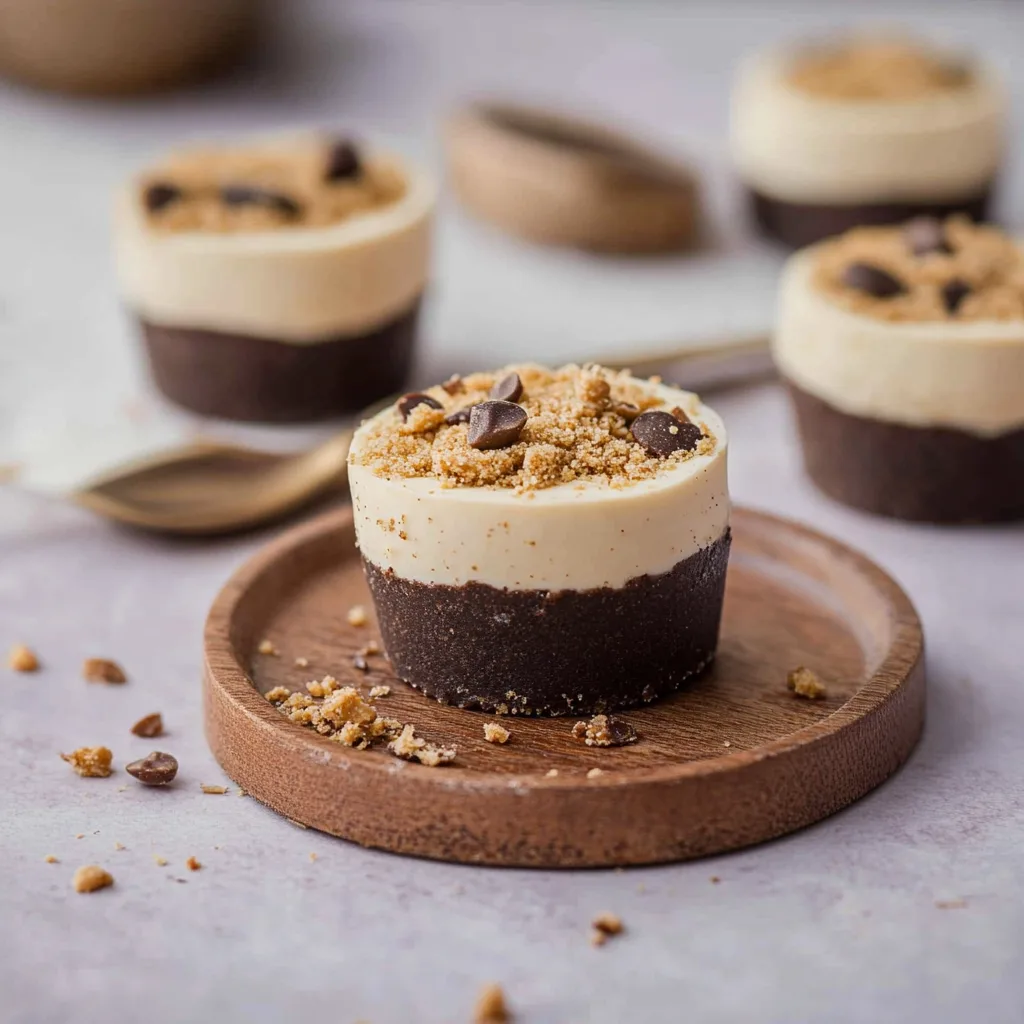
Step 5: Add Optional Toppings and Serve
- Just before serving, drizzle each protein peanut butter cheesecake cup with melted dark chocolate. The easiest way to do this is to place the melted chocolate in a small plastic bag, snip off a tiny corner, and pipe it over the cups.
- Sprinkle with chopped peanuts and add a fresh berry to each cup if desired.
- Carefully remove the cups from the muffin tin and peel away the paper liners if serving on a platter.
Visual cue: The filling should be completely set and hold its shape when the liner is removed. If it’s still too soft, return to the refrigerator for additional chilling time.
Delicious Variations
1. Chocolate Lover’s Protein Peanut Butter Cheesecake Cups
Add 2 tablespoons of unsweetened cocoa powder to the filling mixture and use chocolate protein powder instead of vanilla. Top with extra chocolate drizzle and chocolate shavings for an intense chocolate experience that still delivers on protein.
2. Banana Split Protein Peanut Butter Cheesecake Cups
Fold ¼ cup mashed ripe banana into the filling and top with a combination of sliced fresh strawberries, a small dollop of whipped cream, and a sprinkle of chopped walnuts. This variation transforms the protein peanut butter cheesecake cups into a healthier version of the classic dessert.
3. Salted Caramel Protein Peanut Butter Cheesecake Cups
Swirl 3 tablespoons of sugar-free caramel sauce into the filling before chilling and sprinkle the tops with flaky sea salt after they’ve set. The salty-sweet combination elevates the peanut butter flavor to new heights.
4. Berry Bliss Protein Peanut Butter Cheesecake Cups
Create a quick berry compote by warming 1 cup mixed berries with 1 tablespoon honey until slightly thickened. Cool completely, then swirl into the filling before chilling. The fruit adds a fresh tartness that balances the rich peanut butter perfectly.
5. Coconut Tropical Protein Peanut Butter Cheesecake Cups
Add ¼ cup toasted coconut flakes to the crust mixture and fold 2 tablespoons into the filling. Top with additional toasted coconut and tiny cubes of fresh mango for a tropical twist that pairs surprisingly well with the peanut butter.
6. Espresso Protein Peanut Butter Cheesecake Cups
Dissolve 1 tablespoon of espresso powder in 1 tablespoon of hot water, let cool, then add to the filling mixture. The coffee flavor enhances the peanut butter while adding a sophisticated note that makes these protein peanut butter cheesecake cups perfect for adult dinner parties.
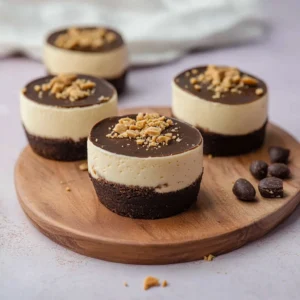
No-Bake Protein Peanut Butter Cheesecake Cups
Equipment
- Mixing bowls
Ingredients
For the Crust:
- 1 cup graham cracker crumbs or gluten-free alternative
- 3 tbsp melted coconut oil or butter
- 1 tbsp honey or maple syrup
- 1 scoop 30g vanilla protein powder
For the Protein Peanut Butter Cheesecake Filling:
- 8 oz reduced-fat cream cheese softened
- ½ cup natural peanut butter
- ¼ cup Greek yogurt
- 2 scoops 60g vanilla protein powder
- 3 tbsp honey or maple syrup
- 1 tsp vanilla extract
- ¼ tsp salt
For Optional Toppings:
- ¼ cup melted dark chocolate 70%+ cocoa
- 2 tbsp chopped peanuts
- Fresh berries optional
Instructions
Step 1: Prepare Your Workspace
- Line a 12-cup muffin tin with paper or silicone liners.
- Make sure all refrigerated ingredients are at room temperature.
Step 2: Make the Crust
- In a bowl, mix graham cracker crumbs, melted coconut oil, honey, and protein powder until it forms a wet sand texture.
- Divide evenly into the muffin liners (about 1 tbsp per cup).
- Press down firmly and chill in the fridge while making the filling.
Step 3: Prepare the Filling
- Beat cream cheese with an electric mixer until smooth (about 2 minutes).
- Add peanut butter, then mix until creamy.
- Add Greek yogurt, protein powder, honey, vanilla, and salt. Mix until smooth.
Step 4: Assemble & Chill
- Scoop the filling into the prepared crusts, smoothing the tops.
- Cover and refrigerate for at least 4 hours (or freeze for 1-2 hours).
Step 5: Add Toppings & Serve
- Drizzle melted dark chocolate and sprinkle with chopped peanuts.
- Garnish with fresh berries, if desired.
Notes
- Meal Prep Friendly: Store in the fridge for up to 5 days or freeze for up to 2 months.
- Vegan Option: Use dairy-free cream cheese, yogurt, and plant-based protein powder.
- Lower-Calorie Option: Swap full-fat peanut butter for powdered peanut butter mixed with water.
- Chocolate Lover’s Version: Use chocolate protein powder and add 2 tbsp cocoa powder to the filling.
Nutrition
Frequently Asked Questions
How long will these protein peanut butter cheesecake cups keep?
Store these protein peanut butter cheesecake cups in an airtight container in the refrigerator for up to 5 days. For longer storage, they freeze beautifully for up to 3 months. To thaw, simply transfer them to the refrigerator overnight or let them sit at room temperature for about 30 minutes before enjoying.
Can I make these protein peanut butter cheesecake cups dairy-free?
Absolutely! Substitute the cream cheese with a high-quality vegan cream cheese alternative, use dairy-free yogurt instead of Greek yogurt, and ensure your protein powder is plant-based. The texture will be slightly different but still delicious.
What type of protein powder works best in this recipe?
For the smoothest texture, a whey isolate protein powder works exceptionally well. However, plant-based proteins like pea protein, rice protein, or blended plant proteins also work nicely. Avoid proteins with a strong flavor that might compete with the peanut butter, and choose ones that mix easily without grittiness.
Why did my filling turn out lumpy?
The most common cause of lumpy filling is using cream cheese that’s still cold. Ensure it’s fully softened to room temperature before beating. If you do end up with lumps, try pressing the mixture through a fine-mesh sieve or giving it a quick blend with an immersion blender.
Can I make one large cheesecake instead of individual cups?
Yes! This recipe adapts beautifully to an 8-inch springform pan. Press the crust mixture into the bottom, pour the filling over it, and refrigerate as directed. Increase the chilling time to at least 6 hours or overnight for best results. You’ll need to adjust the serving process, cutting slices rather than serving individual cups.
How can I increase the protein content even further?
To boost the protein content in these protein peanut butter cheesecake cups, you can add 2-3 tablespoons of unflavored collagen peptides to the filling without affecting the taste or texture. Additionally, using a higher-protein Greek yogurt (like those with 20+ grams per serving) will add extra protein without changing the flavor profile.
Closing Thoughts
I’ll never forget the day my fitness trainer asked me what I’d been eating differently, noticing my improved energy during workouts. When I somewhat sheepishly admitted to eating these protein peanut butter cheesecake cups as my pre-workout fuel, she asked for a sample. After trying one, she not only approved but asked for the recipe to share with her other clients.
That’s what I love about these protein peanut butter cheesecake cups – they bridge the gap between nutrition and indulgence in a way that feels like you’re breaking the rules while actually nourishing your body. They honor the traditional indulgence of cheesecake while innovating through the addition of protein and healthier ingredients.
As you make these protein peanut butter cheesecake cups in your own kitchen, I encourage you to experiment with the flavors and additions that speak to your taste preferences. Perhaps you’ll add a spice that reminds you of a favorite childhood treat, or top them with a fruit that’s meaningful to your family traditions.
Food is more than just fuel – it’s an experience that connects us to our bodies, our memories, and each other. These protein peanut butter cheesecake cups have become a way for me to share my passion for balance and well-being with the people I love. I hope they bring the same joy and satisfaction to your table, whether you’re enjoying them after a challenging workout, serving them at a gathering of friends, or simply treating yourself to a moment of delicious solitude.
I LOVE IT
I absolutely love Panera Bread’s Chicken Salad! It’s the perfect blend of fresh ingredients and delicious flavors. The chicken is always tender and well-seasoned, and the combination of crisp celery, crunchy pecans, and sweet grapes creates a perfect balance of textures and tastes. The creamy dressing ties everything together beautifully without being too heavy.
Whether I have it on a sandwich, with a side salad, or just by itself, it never disappoints. It’s a great option for a light yet satisfying meal. I highly recommend it to anyone looking for a refreshing and tasty chicken salad.