
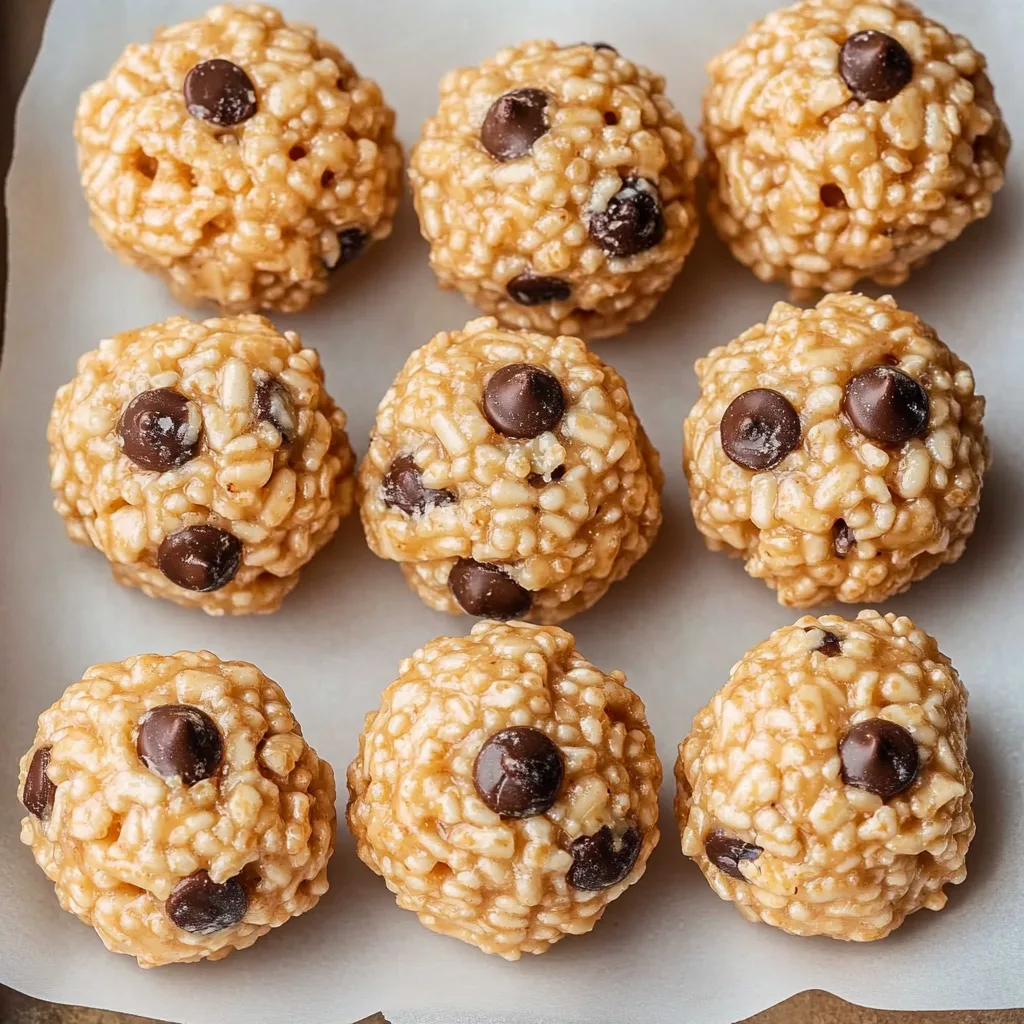
The satisfying crunch of Rice Krispies cereal combined with the rich creaminess of nut butter and the natural sweetness of honey creates a texture and flavor experience that’s absolutely irresistible. I’ve been making these Rice Krispies energy balls for years, and they never fail to disappear within days—sometimes hours!—of preparation. What makes these Rice Krispies energy balls so special is the perfect balance of wholesome ingredients that come together to create a snack that’s not only delicious but also provides lasting energy. The gentle snap as you bite into one of these golden spheres gives way to a chewy interior studded with crispy pockets and occasional bursts of sweetness from chocolate chips or dried fruit. Unlike many store-bought energy bars that taste artificial or overly processed, these homemade treats maintain their fresh, natural flavors while delivering protein, healthy fats, and complex carbohydrates. Keep reading to discover why these little powerhouses have become my family’s favorite grab-and-go snack and how you can customize them to make them your own!
Why You’ll Love These Rice Krispies Energy Balls
If you’ve ever found yourself scrambling for a quick breakfast as you rush out the door or reaching for expensive (and often sugar-laden) convenience snacks to fuel your afternoon, these Rice Krispies energy balls solve that problem beautifully. Unlike traditional methods that require precise technique, this recipe is wonderfully forgiving—perfect for beginning cooks or busy parents who need to throw something together quickly.
I first created these when my son started competitive swimming. Those 5 AM practices meant we needed something portable, nutritious, and appealing to a picky teenager. The first time I packed these instead of a commercial protein bar, I was honestly worried he’d turn his nose up at them. Instead, his friends started asking if I could make extra for them too! Soon I was known as the “energy ball mom” at swim meets, with kids and parents alike asking for the recipe.
What makes these Rice Krispies energy balls truly standout is their versatility. Don’t have honey? Use maple syrup. Prefer sunflower seed butter to peanut butter? Swap it in! Want more protein? Add some protein powder. The basic formula stays the same, but you can easily adapt it to your dietary needs and flavor preferences. I’ve created seasonal variations, allergy-friendly options, and even dessert-inspired versions that still maintain the nutritional benefits.
Now, let’s get into exactly what you’ll need to make these delightful little energy-boosting treats!
Ingredients for Rice Krispies Energy Balls
Base Ingredients:
- 1 cup Rice Krispies cereal: The star ingredient that gives these energy balls their signature crunch and nostalgic flavor. For best results, use fresh cereal that hasn’t been sitting open in your pantry. The original Rice Krispies work perfectly, but you can also use the brown rice version for added whole grains.
- ½ cup creamy natural peanut butter: Acts as the binder and provides protein and healthy fats. Look for varieties with just peanuts and salt listed in the ingredients. Almond butter, cashew butter, or sunflower seed butter all make excellent substitutions depending on your preference or allergy needs.
- ⅓ cup honey: Provides natural sweetness and helps everything stick together. Local honey offers subtle floral notes, but regular clover honey works great too. Maple syrup makes a perfect vegan alternative with a slightly different but equally delicious flavor profile.
- 1 cup old-fashioned rolled oats: Creates a hearty, chewy texture and adds fiber. Quick oats will work in a pinch but provide less texture. For a gluten-free version, ensure you’re using certified gluten-free oats.
- ¼ cup ground flaxseed: Adds omega-3 fatty acids and a subtle nutty flavor. Pre-ground flaxseed is convenient, but grinding your own ensures maximum freshness. Chia seeds can substitute but will change the texture slightly.
- 1 teaspoon vanilla extract: Enhances all the other flavors in the mixture. Pure vanilla extract rather than imitation offers the best flavor.
Optional Add-ins (choose 2-3):
- ¼ cup mini chocolate chips: Add indulgent little pockets of sweetness. Semi-sweet works best, but dark chocolate chips add antioxidants and less sugar. For dairy-free versions, ensure your chocolate chips are dairy-free.
- ¼ cup dried cranberries or raisins: Provides chewy texture contrast and fruity flavor. Look for varieties without added sugar for a healthier option. Other dried fruits like chopped apricots or blueberries make great seasonal substitutions.
- 3 tablespoons chia seeds: Boosts the nutrition profile with additional omega-3s and fiber. These will absorb moisture over time, making the balls firmer after storage.
- ¼ cup chopped nuts (almonds, walnuts, or pecans): Adds texture and additional protein. Toast them lightly before adding for enhanced flavor.
- 2 tablespoons unsweetened cocoa powder: Creates a chocolate version that kids especially love. Dutch-processed gives a smoother flavor, while natural cocoa provides more antioxidants.
- 1 teaspoon cinnamon: Adds warmth and complexity to the flavor profile. Ceylon cinnamon offers a more delicate flavor than the more common Cassia variety.
- ¼ teaspoon sea salt: Enhances all the flavors, especially important if using unsalted nut butter. Flaky sea salt makes an excellent finishing touch sprinkled on top.
How to Make Rice Krispies Energy Balls
Step 1: Prepare Your Base Mixture
- In a large mixing bowl, combine the peanut butter and honey. Stir until completely smooth and integrated.
- The mixture should look glossy and uniform with no separated streaks of honey. If your peanut butter is particularly stiff, microwave the mixture for 10-15 seconds to soften it.
- Add the vanilla extract and stir to incorporate.
- If you’re adding cocoa powder or cinnamon, whisk it in now for even distribution.
Step 2: Add the Dry Ingredients
- Add the rolled oats and ground flaxseed to the peanut butter mixture. Stir until well combined.
- Gently fold in the Rice Krispies cereal. Use a folding motion rather than aggressive stirring to prevent crushing the cereal completely.
- The mixture should hold together when pressed but still maintain visible Rice Krispies pieces throughout. This texture contrast is what makes these energy balls special!
- If the mixture seems too wet, add an additional tablespoon of oats. If too dry, add a bit more nut butter.
Step 3: Incorporate Mix-ins
- Once your base is well mixed, fold in your chosen add-ins (chocolate chips, dried fruit, chopped nuts, etc.).
- Distribute them evenly throughout the mixture using a gentle folding motion.
- If using chocolate chips in warmer weather, consider chilling the base mixture for 15 minutes before adding them to prevent melting.
- For even distribution of smaller ingredients like chia seeds, mix them with the oats before adding to the wet ingredients.
Step 4: Chill the Mixture
- Cover the bowl with plastic wrap and refrigerate for 30 minutes.
- This chilling step is crucial—it allows the mixture to firm up, making it easier to roll into balls and helping the Rice Krispies absorb some moisture.
- The mixture is ready when it holds together easily when pressed but isn’t so sticky that it adheres to your hands immediately.
- Don’t skip this step—working with room temperature mixture will be frustratingly messy and may result in squashed Rice Krispies.
Step 5: Form the Energy Balls
- Once chilled, remove the mixture from the refrigerator.
- Using a tablespoon measure or cookie scoop for consistency, portion out the mixture.
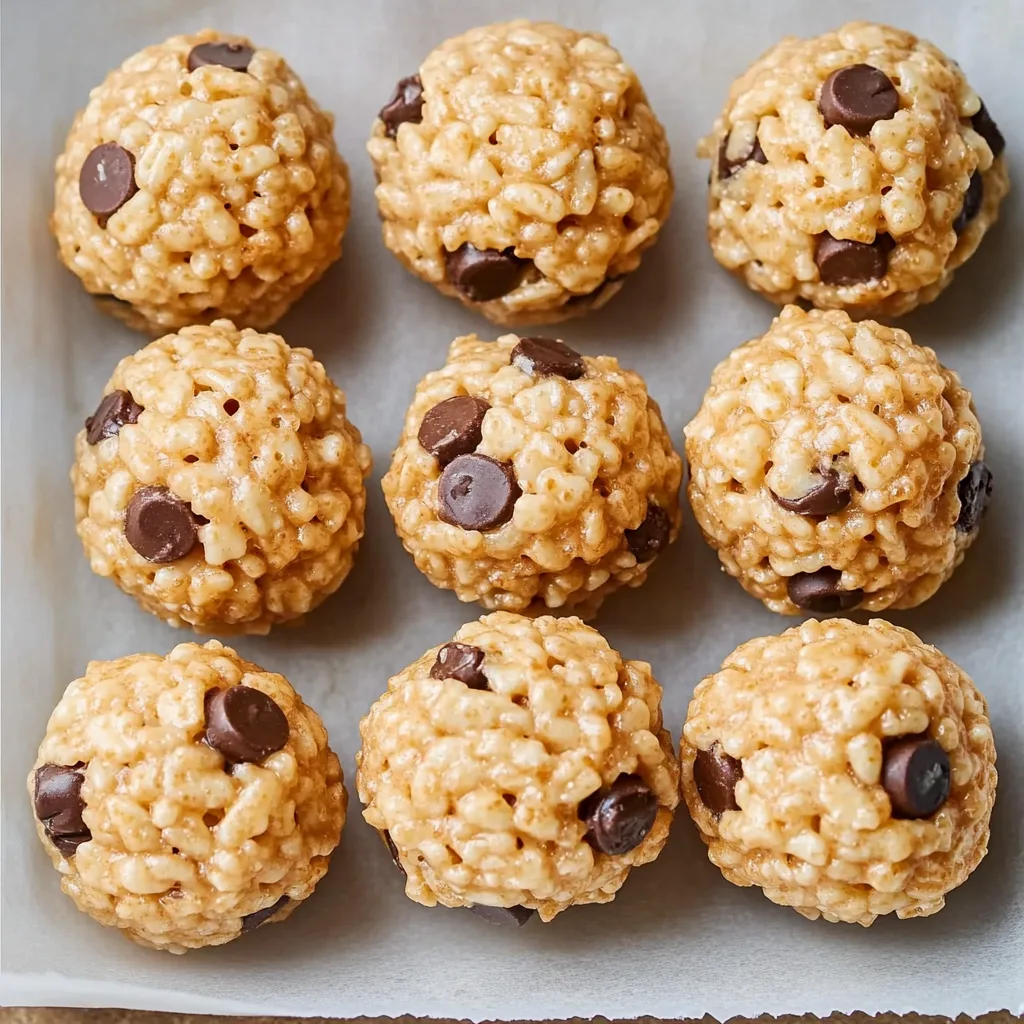
- Roll each portion between your palms to form balls about 1-inch in diameter.
- Apply gentle, even pressure—too much force will crush the Rice Krispies and lose that wonderful textural contrast.
- If the mixture begins sticking to your hands, lightly wet your palms with cold water between rolls.
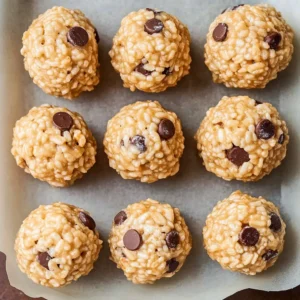
- Place the formed balls on a parchment-lined tray as you work.
Step 6: Final Chill and Storage
- Once all balls are formed, return them to the refrigerator for at least 1 hour to fully set.
- The energy balls should feel firm to the touch and hold their shape perfectly when removed from the refrigerator.
- Transfer to an airtight container, separating layers with parchment paper to prevent sticking.
- Store in the refrigerator for optimal freshness and texture.
- For grab-and-go convenience, you can individually wrap each ball in parchment paper.
Variations of Rice Krispies Energy Balls
1. Chocolate Peanut Butter Cup Rice Krispies Energy Balls
Transform these treats into a healthy version of your favorite candy by adding 2 tablespoons of cocoa powder to the base and folding in ¼ cup of mini peanut butter chips along with the standard chocolate chips. A pinch of flaky sea salt on top creates the perfect sweet-salty balance that makes these irresistible.
2. Lemon Blueberry Rice Krispies Energy Balls
For a refreshing spring or summer variation, add the zest of one lemon, 1 teaspoon of lemon extract, and ¼ cup of dried blueberries. Replace the peanut butter with cashew butter for a milder base that lets the bright citrus flavors shine through. These make a perfect post-workout refreshment during warmer months.
3. Pumpkin Spice Rice Krispies Energy Balls
When fall arrives, incorporate 3 tablespoons of pumpkin puree (making sure to reduce the honey slightly to compensate for the added moisture), 1½ teaspoons of pumpkin pie spice, and ¼ cup of white chocolate chips. Using almond butter as your base complements the warm spices beautifully. These taste like little bites of pumpkin pie without all the work!
4. Tropical Vacation Rice Krispies Energy Balls
Escape to the islands with a tropical version featuring ¼ cup each of chopped dried mango and unsweetened coconut flakes. Add ½ teaspoon of coconut extract and use macadamia nut butter if you can find it (or substitute cashew butter). These make wonderful summer treats that kids and adults both love.
5. Double Chocolate Mint Rice Krispies Energy Balls
For a refreshing twist, add 2 tablespoons of cocoa powder to the base mixture along with ¼ teaspoon of peppermint extract (be careful—it’s potent!). Fold in ¼ cup of dark chocolate chips or mint chocolate chips. These taste like a healthy version of those famous Girl Scout cookies and make perfect after-dinner mini-treats.
6. High-Protein Recovery Rice Krispies Energy Balls
Ideal for serious athletes, add 2 tablespoons of unflavored or vanilla protein powder to the base mixture, along with 2 tablespoons of ground hemp seeds and 1 tablespoon of tart cherry juice concentrate (known for muscle recovery properties). Reduce honey slightly to maintain the right consistency. These make perfect post-workout nutrition.
Rice Krispies Energy Balls Recipe
Equipment
Ingredients
Base Ingredients:
- ✅ 1 cup Rice Krispies cereal
- ✅ ½ cup creamy natural peanut butter or almond/sunflower seed butter
- ✅ ⅓ cup honey or maple syrup for vegan
- ✅ 1 cup old-fashioned rolled oats certified gluten-free if needed
- ✅ ¼ cup ground flaxseed or chia seeds
- ✅ 1 teaspoon vanilla extract
Optional Add-Ins (Choose 2-3):
- 🍫 ¼ cup mini chocolate chips semi-sweet, dark, or dairy-free
- 🍇 ¼ cup dried cranberries or raisins
- 🥜 ¼ cup chopped nuts almonds, walnuts, pecans
- 🌱 3 tablespoons chia seeds
- 🍫 2 tablespoons unsweetened cocoa powder
- 🍂 1 teaspoon cinnamon
- 🧂 ¼ teaspoon sea salt
Instructions
Step 1: Mix the Base
- 1️⃣ In a large bowl, combine peanut butter and honey until smooth.
- 2️⃣ Stir in vanilla extract and optional cocoa powder or cinnamon, if using.
Step 2: Add Dry Ingredients
- 3️⃣ Mix in oats and ground flaxseed.
- 4️⃣ Gently fold in Rice Krispies cereal—be careful not to crush them!
Step 3: Incorporate Add-ins
- 5️⃣ Stir in chocolate chips, dried fruit, nuts, or other mix-ins of your choice.
Step 4: Chill the Mixture
- 6️⃣ Cover the bowl and refrigerate for 30 minutes to firm up.
Step 5: Roll into Balls
- 7️⃣ Use a tablespoon or cookie scoop to portion out the mixture.
- 8️⃣ Roll into 1-inch balls with your hands (lightly wet palms if needed).
Step 6: Final Chill & Storage
- 9️⃣ Place on a parchment-lined tray and refrigerate for 1 hour to fully set.
- 🔟 Store in an airtight container in the fridge for up to 1 week or freeze for up to 2 months.
Notes
✔ For extra protein: Add 2 tablespoons of protein powder.
✔ To prevent sticking: Lightly grease hands or use parchment paper.
✔ For a nut-free version: Use sunflower seed butter instead of peanut butter.
Nutrition
Frequently Asked Questions About Rice Krispies Energy Balls
How should I store these Rice Krispies energy balls and how long do they last?
These energy balls keep best in an airtight container in the refrigerator, where they’ll maintain their optimal texture and freshness for up to two weeks. For longer storage, you can freeze them for up to three months. Place them in a single layer on a parchment-lined tray to freeze individually before transferring to a freezer bag or container. Thaw in the refrigerator or at room temperature for about 15-30 minutes before enjoying.
Can I make these Rice Krispies energy balls nut-free for school lunches?
Absolutely! Simply substitute the peanut butter with sunflower seed butter or wow butter, which are completely nut-free alternatives that maintain a similar consistency and protein content. Be sure to check your Rice Krispies cereal packaging to confirm it’s produced in a nut-free facility if allergies are severe. With these substitutions, these energy balls make perfect lunchbox additions that comply with school nut-free policies.
Why aren’t my energy balls holding together properly?
If your mixture is too crumbly, there are a few possible culprits. First, different brands of nut butter have varying consistencies—some are oilier than others. If using a very dry nut butter, you may need an extra tablespoon of honey or even a tablespoon of coconut oil to add binding moisture. Second, be sure you’re not using too many dry add-ins. Finally, don’t skip the chilling step, which helps everything firm up and stick together properly.
Can I make these Rice Krispies energy balls vegan?
Yes! Simply substitute the honey with pure maple syrup or agave nectar in equal amounts. Ensure your chocolate chips (if using) are vegan, or substitute with cacao nibs for a less sweet but still delicious chocolate element. All other ingredients in the base recipe are naturally vegan-friendly.
My family doesn’t like the texture of flaxseed. Can I leave it out?
Certainly! You can either omit the flaxseed entirely or substitute with an equal amount of additional oats, hemp seeds, or chia seeds (though chia will absorb more moisture). If you want the nutritional benefits of flax without the texture, try using flaxseed oil instead—about 1 tablespoon can replace the ground seeds, though you may need to adjust other ingredients slightly to maintain the right consistency.
How can I increase the protein content in these energy balls?
There are several easy ways to boost protein: add 2-3 tablespoons of your favorite protein powder (unflavored, vanilla, or chocolate work well), substitute part of the oats with quinoa flakes, include chopped nuts or hemp seeds in your mix-ins, or use a higher-protein nut butter like peanut butter instead of alternatives like cashew butter. Just remember that adding protein powder may require a bit more liquid binder to maintain the right consistency.
Sharing the Energy Ball Love
The first time I brought these Rice Krispies energy balls to my daughter’s dance recital, the other parents circled around like curious birds, asking what these little spheres of deliciousness were. My grandmother was skeptical until she tasted it and declared it a worthy twist on her classic Rice Krispies treats recipe—high praise from a woman who rarely strays from tradition! There’s something magical about watching someone bite into one of these treats for the first time—the surprise when they realize something so simple can taste so good while actually being nutritious.
What I love most about these Rice Krispies energy balls is how they bridge generations and dietary preferences. My health-conscious sister enjoys them alongside my dessert-loving husband. My kids and their friends devour them without realizing they’re eating something with actual nutritional value. They’ve become our family’s love language—I make them when someone has a big test, an important game, or just needs a little pick-me-up.
I encourage you to think of this recipe as a template rather than a rigid set of instructions. Add the ingredients that bring you joy, adjust the sweetness to your preference, or create a signature variation that becomes your own family tradition. The true magic of cooking isn’t just in following recipes—it’s in making them your own and sharing that love with others. So roll up your sleeves, get your hands a little sticky, and create these little spheres of energy that just might become your family’s new favorite tradition too.