

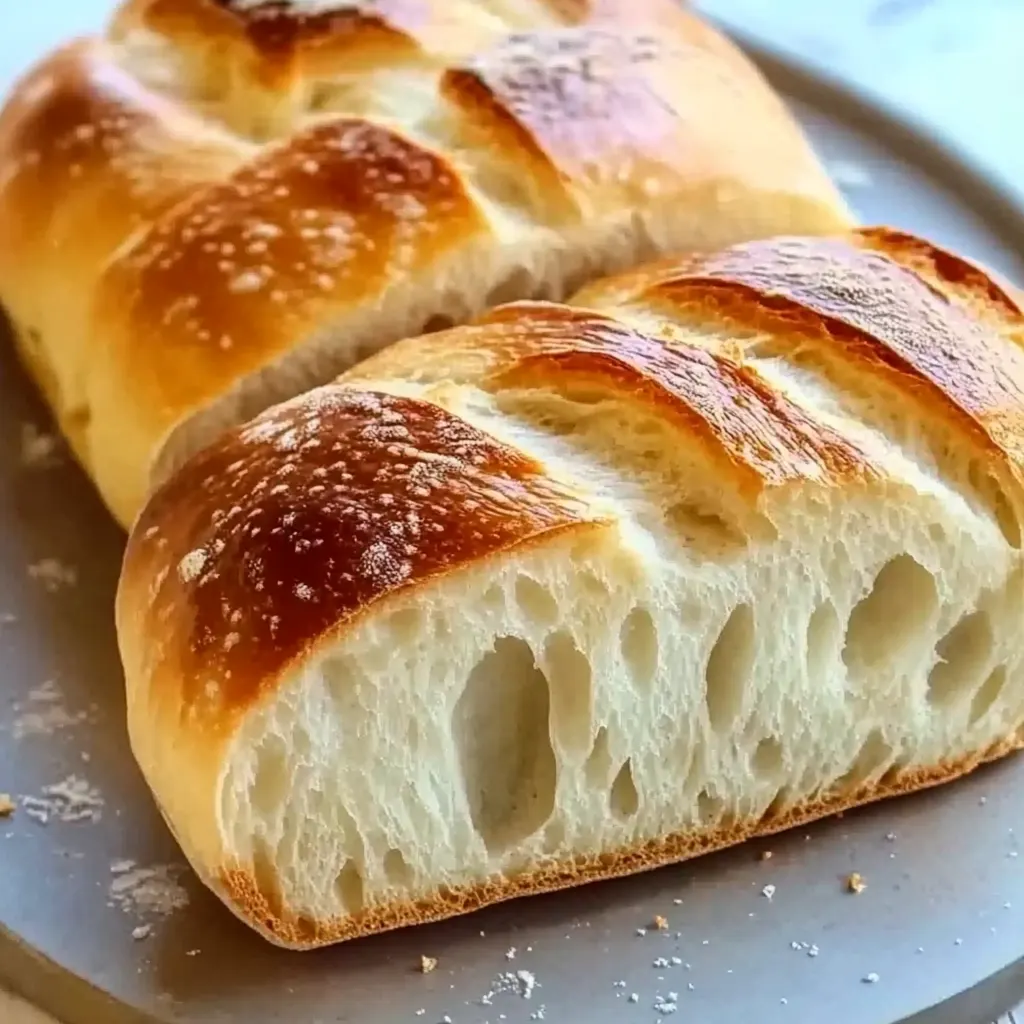
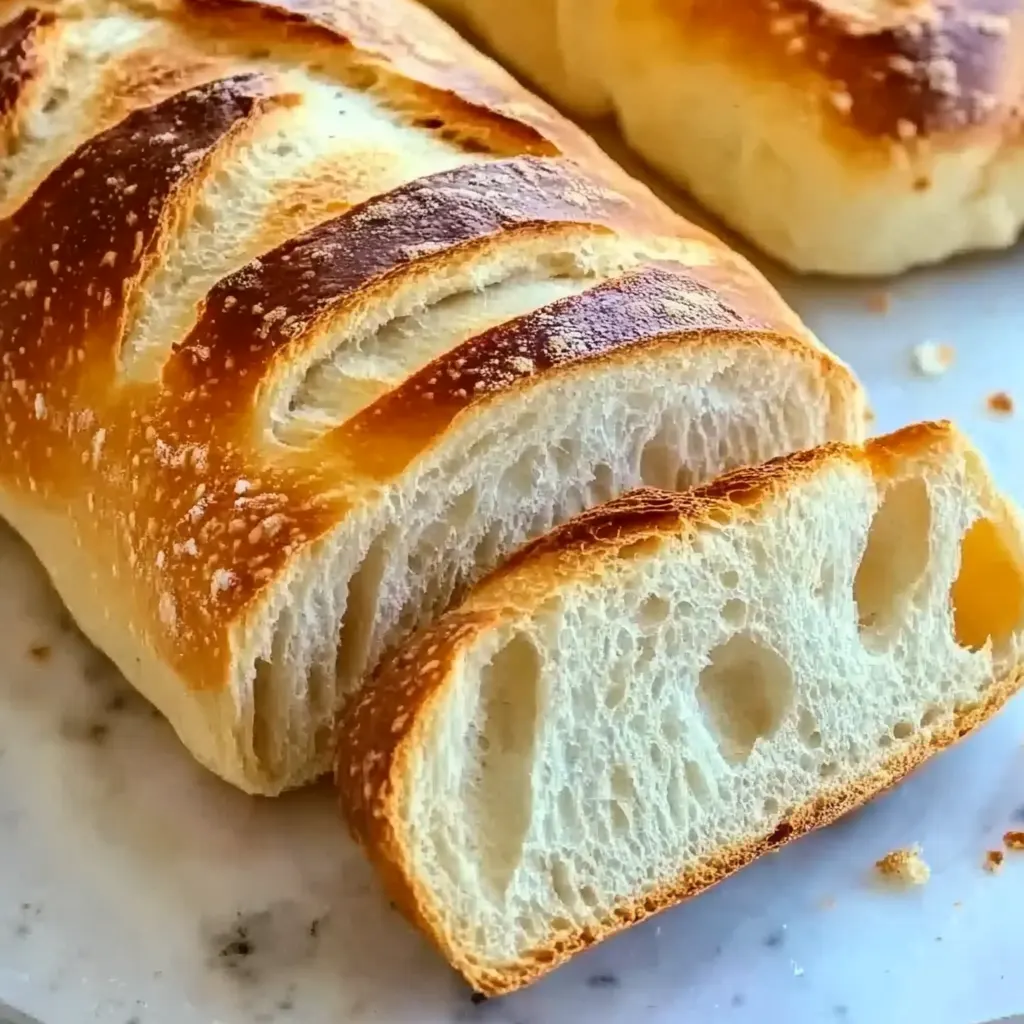
The first time I pulled a loaf of Soft and Fluffy French Bread from my oven, the intoxicating aroma filled my entire home, transporting me instantly to the small bakeries I’d visited in France. This Soft and Fluffy French Bread recipe has become my most treasured kitchen accomplishment – creating that perfect balance of a delicately crisp crust that gives way to an airy, tender interior with just the right amount of chew. What makes this Soft and Fluffy French Bread truly special is how it combines traditional French bread techniques with a few clever adjustments that ensure consistent results, even for novice bakers. When you tear into a warm slice, you’ll hear the subtle crackle of the crust before your teeth sink into the pillowy center that’s dotted with those beautiful air pockets that capture butter, olive oil, or sauce perfectly. Keep reading to discover how you can create this bakery-worthy Soft and Fluffy French Bread in your own kitchen, with surprisingly simple techniques that deliver extraordinary results.
Why You’ll Love This Soft and Fluffy French Bread Recipe
If you’ve ever been intimidated by bread baking or disappointed by dense, heavy homemade loaves, this Soft and Fluffy French Bread recipe solves those common challenges beautifully. Unlike traditional French bread recipes that can be temperamental and technique-heavy, this version is wonderfully forgiving while still delivering authentic flavor and texture.
I first developed this Soft and Fluffy French Bread recipe during a particularly stressful week when I needed something soothing and productive to do with my hands. My neighbor—a French expatriate with exacting standards—stopped by as I was pulling a batch from the oven. Skeptical at first (as she had every right to be about an American’s French bread), she accepted a still-warm slice spread with good butter. Her eyes widened in surprise, and she immediately asked for a second piece. “This reminds me of home,” she whispered, which remains the highest compliment this recipe has ever received.
What’s particularly wonderful about this Soft and Fluffy French Bread is its versatility. The dough can be shaped into classic baguettes, round boules, sandwich loaves, or even dinner rolls. It’s perfect for everything from sophisticated crostini to humble French toast, and it elevates any meal from ordinary to special. The bread freezes beautifully, meaning you can always have homemade bread on hand without daily baking.
Now, let’s explore exactly what you’ll need to create this magical Soft and Fluffy French Bread in your own kitchen.
Ingredients for Soft and Fluffy French Bread
For the Bread Dough:
- 4 cups (500g) bread flour – The higher protein content in bread flour creates better structure and chew compared to all-purpose flour. If you only have all-purpose flour, it will work, but the texture won’t be quite as authentic. For a softer crumb, you can substitute up to 1 cup with all-purpose flour.
- 1½ teaspoons (9g) fine sea salt – Salt controls the yeast fermentation rate and strengthens the gluten structure, while also enhancing flavor. Kosher salt works well too, but avoid table salt if possible as the iodine can impart a slight metallic taste.
- 2¼ teaspoons (7g) active dry yeast – This is equivalent to one standard packet. You can substitute instant yeast, which doesn’t need to be proofed first, but the slower action of active dry yeast contributes to better flavor development.
- 1½ cups (355ml) warm water (105-110°F) – The temperature is crucial: too hot will kill the yeast, too cool will slow activation. Use a thermometer if you’re new to bread baking. In a pinch, water that feels like warm bathwater is about right.
- 2 tablespoons (30ml) honey or sugar – This feeds the yeast and contributes to a more tender crumb and golden crust. Traditional French bread often uses no sugar, but this small addition greatly improves the texture without compromising authenticity.
- 1 tablespoon (15ml) olive oil – A modest amount of fat makes this French bread softer and more tender than completely lean doughs. For a more rustic loaf, you can omit this, but I find it creates that perfect balance of chew and tenderness.
For the Perfect Crust:
- 1 egg white mixed with 1 tablespoon water – This egg wash creates a shiny, golden crust. For a more traditional finish, you can use just water or steam in the oven instead.
- Extra flour for dusting – Use bread flour or all-purpose flour for shaping and preventing sticking.
- Cornmeal for dusting the baking sheet – This prevents sticking and adds a slight textural element to the bottom crust.
How to Make Soft and Fluffy French Bread
Step 1: Activate the Yeast
- In a large bowl or the bowl of your stand mixer, combine the warm water (105-110°F) and honey or sugar, stirring until dissolved.
- Sprinkle the active dry yeast over the water mixture and stir gently. Let this sit for 5-10 minutes until foamy. This confirms your yeast is alive and active – you should see a creamy, frothy layer forming on top. If nothing happens, your yeast might be dead or your water was too hot, and you’ll need to start over.
- Add the olive oil to the yeast mixture and stir to combine.
Step 2: Create and Develop the Dough
- In a separate bowl, whisk together the bread flour and salt to ensure even distribution of the salt, which can inhibit yeast if it comes into direct contact.
- Gradually add about 3 cups of the flour mixture to the wet ingredients, stirring with a wooden spoon until a shaggy dough forms. If using a stand mixer, use the paddle attachment initially.
- Once combined, switch to kneading by hand on a lightly floured surface or change to the dough hook attachment on your mixer. Gradually add the remaining flour as needed – the dough should be tacky but not overly sticky. It should pull away from the sides of the bowl but may still stick slightly to the bottom.
- Knead for 8-10 minutes by machine or 10-12 minutes by hand. This develops the gluten structure essential for that perfect texture. The dough is ready when it passes the “windowpane test” – take a small piece and stretch it between your fingers. It should stretch thin enough to see light through without tearing immediately.
Step 3: First Rise
- Shape the dough into a smooth ball and place in a lightly oiled bowl, turning once to coat both sides with oil. This prevents the surface from drying out during rising.
- Cover with a clean kitchen towel or plastic wrap and let rise in a warm, draft-free spot until doubled in size, about 60-90 minutes. The ideal temperature is 75-78°F. If your kitchen is cool, try placing the dough in your oven with just the light turned on.
- The dough is ready when you gently press it with your finger and the indentation remains. If it springs back immediately, it needs more time.
Step 4: Shape the Loaves
- Once doubled, gently deflate the dough by pressing down on it – do not punch or handle roughly as this will expel the gas bubbles that create that desirable texture.
- Turn the dough onto a lightly floured surface and divide it in half for two loaves (or keep whole for one large loaf).
- For each portion, flatten into a rough rectangle about 9×5 inches, then fold the long sides into the center, overlapping slightly, like folding a letter. Roll it up starting from the short end, creating surface tension by pulling the dough toward you with the seam side down as you roll.
- Pinch all seams and ends to seal, then gently roll and stretch the loaf to your desired length – about 12-14 inches for a typical baguette shape, shorter for a batard shape.
- Place the shaped loaves seam-side down on a baking sheet dusted with cornmeal or lined with parchment paper. If making baguettes, you can use a special perforated baguette pan or create a makeshift support by rolling kitchen towels and placing them between the loaves to help maintain their shape.
Step 5: Second Rise and Prepare for Baking
- Cover the shaped loaves loosely with a lightly oiled plastic wrap or a clean kitchen towel and let rise until nearly doubled, about 45-60 minutes.
- While the loaves are rising, place a rack in the middle of your oven and another rack on the bottom. Place an empty metal baking pan on the bottom rack. Preheat the oven to 450°F (230°C) for at least 30 minutes before baking.
- When the loaves have nearly doubled, they should look puffy and hold an indentation when gently poked. Using a very sharp knife or a bread lame, make 3-4 diagonal slashes about ¼-inch deep across the top of each loaf. These slashes allow for expansion during baking and create that classic French bread appearance.
- Brush the loaves gently with the egg white mixture for a shiny, golden crust.
Step 6: Create Steam and Bake
- Place the baking sheet with the loaves on the middle rack of the preheated oven. Immediately pour 1 cup of hot water into the empty baking pan on the bottom rack to create steam, then quickly close the oven door to trap the steam. This steam is crucial for developing that characteristic crisp crust.
- Bake for 20-25 minutes for baguette shapes, or 25-30 minutes for larger loaves. The bread is done when it’s deeply golden brown and sounds hollow when tapped on the bottom. For the most accurate results, the internal temperature should read 190-210°F (88-99°C) on an instant-read thermometer.
- For an extra-crispy crust, turn off the oven, crack the door open slightly, and leave the bread inside for an additional 5 minutes.
- Transfer the loaves to a wire cooling rack immediately to prevent the bottom from becoming soggy. Allow to cool for at least 30 minutes before slicing – cutting too soon will cause the bread to become gummy.
Creative Variations for Soft and Fluffy French Bread
Herb-Infused Countryside Loaf
Incorporate 2 tablespoons of finely chopped fresh herbs (rosemary, thyme, and sage work beautifully) into the dough after the first rise. Sprinkle the top with flaky sea salt just before baking for an aromatic loaf that pairs perfectly with soups and stews.
Roasted Garlic and Parmesan Batard
Fold in 1 head of roasted garlic cloves (cooled) and ½ cup freshly grated Parmesan cheese after the first rise. Shape into a shorter, wider batard and make fewer, more dramatic slashes for an impressive presentation. This variation makes extraordinary garlic bread when sliced horizontally and toasted.
Whole Wheat Honey Loaf
Replace 1½ cups of the bread flour with whole wheat flour and increase the honey to 3 tablespoons for a nuttier, slightly sweeter bread that maintains a surprisingly light texture. The higher honey content helps counteract the heaviness often associated with whole wheat bread.
Kalamata Olive and Lemon Zest Boule
Add 1 cup of chopped Kalamata olives (well-drained and patted dry) and the zest of one lemon after the first rise. Shape into a round boule instead of a baguette and bake in a preheated Dutch oven with the lid on for the first 20 minutes, then uncovered for 10-15 minutes for a rustic artisanal loaf.
Seeded Crust Country Loaf
After brushing with egg wash, sprinkle a mixture of sesame, poppy, flax, and sunflower seeds over the loaves before baking. This adds a delightful textural contrast and nutty flavor while boosting nutritional value.
Sun-Dried Tomato and Basil Twist
Incorporate ⅓ cup finely chopped sun-dried tomatoes (oil-packed and drained) and 2 tablespoons fresh basil after the first rise. Divide the dough in half, roll each half into a rope, then twist the two ropes together before the second rise for a visually stunning loaf with Mediterranean flavors.
Homemade Soft and Fluffy French Bread
Equipment
- Large mixing bowl
Ingredients
For the Bread Dough:
- 4 cups 500g bread flour
- 1½ teaspoons 9g fine sea salt
- 2¼ teaspoons 7g active dry yeast (1 standard packet)
- 1½ cups 355ml warm water (105-110°F)
- 2 tablespoons 30ml honey or sugar
- 1 tablespoon 15ml olive oil
For the Perfect Crust:
- 1 egg white mixed with 1 tablespoon water for a shiny finish
- Extra flour for dusting
- Cornmeal for dusting the baking sheet
Instructions
Step 1: Activate the Yeast
- Stir warm water and honey (or sugar) in a bowl.
- Sprinkle yeast over the mixture; let sit for 5-10 minutes until foamy.
- Stir in olive oil.
Step 2: Create the Dough
- In another bowl, whisk together flour and salt.
- Add 3 cups of the flour mixture to wet ingredients, stirring to combine.
- Knead for 8-10 minutes (by hand or using a mixer with a dough hook), gradually adding the remaining flour until smooth and slightly tacky.
Step 3: First Rise
- Shape dough into a ball and place in an oiled bowl. Cover and let rise for 60-90 minutes until doubled.
Step 4: Shape the Loaves
- Deflate dough gently and divide into 2 pieces (or keep whole for a larger loaf).
- Shape into baguettes or another preferred shape, sealing seams.
- Place on a baking sheet dusted with cornmeal.
Step 5: Second Rise & Prepare Oven
- Cover loosely and let rise for 45-60 minutes until puffy.
- Preheat oven to 450°F (230°C) with an empty pan on the bottom rack.
Step 6: Score & Bake
- Score loaves with a sharp knife. Brush with egg wash.
- Pour 1 cup of hot water into the empty pan to create steam.
- Bake for 20-30 minutes until golden brown and hollow-sounding when tapped.
Step 7: Cool & Enjoy
- Transfer to a wire rack; let cool for at least 30 minutes before slicing.
Notes
✔️ Flour substitution: Use up to 1 cup all-purpose flour for a slightly softer texture.
✔️ Yeast tip: If yeast doesn’t foam, it may be expired or water temperature was incorrect.
✔️ Freezing: Wrap tightly and freeze for up to 3 months.
Nutrition
Frequently Asked Questions About Soft and Fluffy French Bread
How should I store this Soft and Fluffy French Bread?
French bread is best enjoyed the day it’s baked, but to preserve freshness, store completely cooled bread in a paper bag at room temperature for up to 2 days. Avoid plastic bags, which trap moisture and make the crust soggy. To refresh day-old bread, sprinkle it lightly with water and heat in a 350°F oven for 5-10 minutes. For longer storage, freeze the fully cooled bread in airtight freezer bags for up to 3 months and thaw at room temperature before refreshing in the oven.
Can I make this Soft and Fluffy French Bread dough ahead of time?
Yes! After the first rise, punch down the dough, cover it tightly, and refrigerate for up to 24 hours. This slow, cold fermentation actually improves flavor development. When ready to bake, remove from the refrigerator, let stand at room temperature for 30 minutes, then shape, rise, and bake as directed. The second rise may take a bit longer since the dough is cold.
Why didn’t my bread rise properly?
Several factors can affect rising: old yeast (test it first in warm water with a pinch of sugar to see if it foams), water that’s too hot or too cold, too much salt in direct contact with yeast, or a too-cool environment. For optimal rising, maintain a warm environment around 75-78°F. If your kitchen is cool, create a warm spot by placing the dough in an oven with just the light on, or on top of a refrigerator where heat collects.
Can I make this bread without a stand mixer?
Absolutely! While a stand mixer makes the process easier, people have been making bread by hand for thousands of years. Mix the ingredients with a wooden spoon until too stiff to stir, then turn onto a floured surface and knead by hand for 10-12 minutes until smooth and elastic. The process takes a bit more effort but can be wonderfully therapeutic and gives you a better feel for the dough’s development.
How can I get a crispier crust?
For an extra-crispy crust, increase steam during baking by placing ice cubes in the bottom tray instead of hot water. Alternatively, spritz the oven walls with water from a spray bottle every few minutes during the first 10 minutes of baking. You can also brush the loaves with water instead of egg wash for a more rustic crust. Baking on a preheated pizza stone or baking steel will also significantly improve crust development.
Can I make this Soft and Fluffy French Bread gluten-free?
Traditional French bread relies heavily on gluten development for its characteristic texture. While you can substitute a 1:1 gluten-free flour blend, the results will differ significantly in texture and flavor. For best results with gluten-free adaptation, add 1 tablespoon of xanthan gum if your flour blend doesn’t include it, increase the water by about 2 tablespoons, and expect a denser final product. Consider adding an egg and 2 tablespoons of olive oil to improve the structure of gluten-free dough.
A Slice of Comfort and Connection
The first time I served this Soft and Fluffy French Bread at a family gathering, my uncle—who usually stays quiet during meals—suddenly became animated. “This reminds me of the bread we ate when your grandmother and I backpacked through Europe as teenagers,” he shared, launching into stories I’d never heard before about their adventures in small French villages and the local bakers who would sell them still-warm loaves wrapped in paper.
What I treasure most about this Soft and Fluffy French Bread recipe is how it serves as both a connection to time-honored traditions and an invitation to create new memories. It honors the fundamental techniques that bakers have used for centuries while incorporating small adjustments that make success more accessible for home bakers.
As you master this recipe and make it your own—perhaps trying one of the variations or creating your own signature version—remember that bread-making is both science and soulcraft. Don’t be discouraged by initial imperfections; each loaf teaches you something new. There’s something profoundly satisfying about transforming such simple ingredients—flour, water, salt, and yeast—into something that nourishes both